
Want to give your kitchen a fresh, new look? Painting your kitchen chairs is a fantastic and affordable DIY project that can dramatically transform your space. This comprehensive guide covers everything you need to know, from prepping your chairs to choosing the right paint and achieving a professional finish. Whether you’re looking for a complete refinishing project or a quick and easy makeover, this kitchen chair painting tutorial will equip you with the knowledge and confidence to get it done.
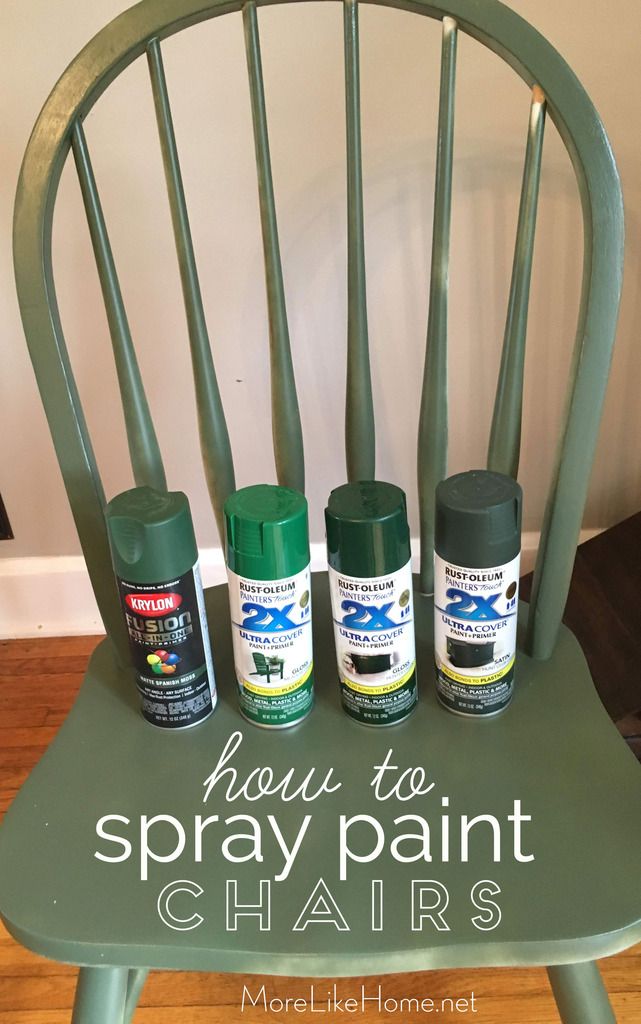
Image Source: projects.morelikehome.net
Why Paint Your Kitchen Chairs?
Painting your kitchen chairs is more than just a cosmetic upgrade. Here’s why it’s a worthwhile project:
- Budget-Friendly: A fresh coat of paint is far cheaper than buying new chairs.
- Personalized Style: Choose colors and finishes that perfectly match your kitchen décor.
- Upcycling: Give old or worn chairs a new lease on life, reducing waste.
- Easy DIY Project: With the right tools and guidance, even beginners can achieve professional-looking results.
- Increased Durability: Quality paint can protect your chairs from wear and tear.
Gathering Your Supplies
Before you begin, make sure you have all the necessary materials. This list covers the essentials for most kitchen chair painting projects:
- Cleaning Supplies:
- Soap (dish soap works well)
- Water
- Clean cloths or sponges
- Degreaser (if chairs are greasy)
- Surface Preparation:
- Sandpaper (various grits: 120, 220)
- Sanding block or electric sander
- Tack cloth
- Primer (optional, but recommended)
- Wood filler (if needed for repairs)
- Putty knife (for applying wood filler)
- Painting Supplies:
- Paint (choose the right type for your chairs – more on this later)
- Paintbrushes (various sizes)
- Paint rollers (for larger, flat surfaces)
- Paint tray
- Painter’s tape
- Drop cloths or plastic sheeting
- Safety Gear:
- Safety glasses
- Dust mask or respirator
- Gloves
Preparing Your Kitchen Chairs for Painting
Proper preparation is key to a long-lasting and beautiful finish. Follow these steps to get your chairs ready:
Step 1: Cleaning
- Remove Dust and Debris: Use a damp cloth to wipe down the entire chair, removing any loose dirt, dust, or cobwebs.
- Wash Thoroughly: Mix warm water with dish soap and scrub the chairs. Pay attention to areas that tend to accumulate grime, such as the legs and around the seat.
- Degrease (If Necessary): If your chairs are greasy, use a degreasing cleaner to remove the oil. Follow the product instructions carefully.
- Rinse and Dry: Rinse the chairs with clean water and allow them to dry completely before proceeding.
Step 2: Repairs
- Inspect for Damage: Carefully examine your chairs for any cracks, dents, or loose joints.
- Repairing Cracks and Dents: Use wood filler to fill any imperfections. Apply the filler with a putty knife, smoothing it out as much as possible. Allow the filler to dry completely according to the manufacturer’s instructions.
- Tightening Loose Joints: If any joints are loose, try tightening the screws or bolts. If that doesn’t work, you may need to disassemble the joint, apply wood glue, and reassemble it. Clamp the joint together until the glue dries.
Step 3: Sanding
Sanding creates a slightly rough surface that allows the paint to adhere better. However, some paints are designed to minimize or eliminate the need for sanding. Let’s explore both options:
Painting Kitchen Chairs Without Sanding
- When It Works: If your chairs have a relatively smooth, clean surface and you’re using a paint specifically designed for no-sanding application (like some chalk paints or paints with built-in primers), you might be able to skip sanding.
- The Process: Thoroughly clean the chairs as described above. Apply a liquid deglosser to dull the surface and improve paint adhesion. Follow the product instructions carefully.
Sanding For Optimal Results
- Why Sand? Sanding ensures the paint adheres properly and creates a smoother finish.
- The Process:
- Start with 120-Grit Sandpaper: Use this to remove any existing finish, scratches, or imperfections.
- Smooth Out with 220-Grit Sandpaper: This will create a smoother surface for painting.
- Sanding Tips: Sand in the direction of the wood grain. Use a sanding block for flat surfaces and sandpaper folded into a point for hard-to-reach areas. If using an electric sander, be careful not to apply too much pressure.
- Dust Removal: After sanding, use a tack cloth to remove all sanding dust. This is crucial for a smooth paint finish.
Step 4: Priming (Recommended)
- Why Prime? Primer helps the paint adhere better, provides a uniform surface, and can block stains from bleeding through.
- Choosing the Right Primer: Select a primer that is compatible with the type of paint you’ll be using. For wood chairs, a wood primer is best. For metal chairs, use a metal primer.
- Applying Primer: Apply a thin, even coat of primer to the entire chair. Use a brush for details and a roller for larger surfaces. Allow the primer to dry completely according to the manufacturer’s instructions. Lightly sand the primed surface with 220-grit sandpaper for an even smoother finish. Remove dust with a tack cloth.
Choosing The Best Paint for Kitchen Chairs
The right paint can make all the difference in the durability and appearance of your finished chairs. Here’s a breakdown of popular options:
| Paint Type | Pros | Cons | Best For |
|---|---|---|---|
| Latex Paint | Durable, easy to clean, low VOCs, wide color selection. | Can require more coats, may not adhere well to glossy surfaces without proper priming. | Everyday use, families with children, kitchens with high traffic. |
| Oil-Based Paint | Extremely durable, provides a hard, glossy finish. | Strong odors, longer drying time, requires mineral spirits for cleanup. | Heavy-duty use, chairs that will be exposed to a lot of wear and tear. |
| Chalk Paint | Matte finish, easy to distress, often requires minimal prep. | Requires a sealant (wax or varnish), can be less durable than other options without a proper topcoat. | Achieving a vintage or distressed look, projects where you want to minimize sanding. |
| Acrylic Paint | Dries quickly, water-based, good color retention. | Not as durable as latex or oil-based paint for high-traffic areas. | Decorative chairs, chairs that won’t be used heavily. |
| Spray Paint | Provides a smooth, even finish, ideal for intricate details. | Can be messy, requires good ventilation, may require multiple coats. | Metal chairs, chairs with intricate designs, achieving a smooth, factory-like finish. |
| Milk Paint | Eco-friendly, creates a unique, chippy finish, good adhesion. | Can be unpredictable, requires mixing, may need a bonding agent for certain surfaces. | Achieving a rustic or farmhouse look, projects where you want a natural, non-toxic finish. |
Color Considerations
- Match Your Kitchen Décor: Choose colors that complement your existing cabinets, countertops, and walls.
- Consider the Style: Bright colors can add a pop of fun to a modern kitchen, while muted tones are better suited for a traditional space.
- Test Colors: Before committing to a color, paint a small sample area on the chair or a piece of cardboard to see how it looks in your kitchen’s lighting.
Painting Techniques
Painting Wooden Kitchen Chairs
- Protect Your Work Area: Lay down drop cloths or plastic sheeting to protect your floors and furniture.
- Tape Off Areas: Use painter’s tape to mask off any areas you don’t want to paint, such as the seat if it’s upholstered.
- Apply the First Coat: Use a brush to paint the details and hard-to-reach areas. Use a roller for larger, flat surfaces. Apply the paint in thin, even coats to avoid drips and runs.
- Allow to Dry: Let the first coat dry completely according to the manufacturer’s instructions.
- Sand Lightly (Optional): If the first coat is rough or uneven, lightly sand it with 220-grit sandpaper to smooth it out. Remove dust with a tack cloth.
- Apply Additional Coats: Apply one or two more coats of paint, allowing each coat to dry completely before applying the next.
- Remove Tape: Carefully remove the painter’s tape while the last coat of paint is still slightly wet. This will prevent the paint from peeling.
How to Spray Paint Kitchen Chairs
- Set Up a Well-Ventilated Area: Spray paint should be used in a well-ventilated area, preferably outdoors.
- Protect Your Surroundings: Cover the ground with drop cloths or plastic sheeting.
- Shake the Can: Shake the spray paint can vigorously for at least two minutes.
- Apply Thin Coats: Hold the can about 10-12 inches away from the chair and spray in a steady, even motion. Apply thin coats to prevent drips and runs.
- Allow to Dry: Let each coat dry completely before applying the next.
- Apply Multiple Coats: Apply two or three coats of spray paint for full coverage.
Chalk Painting Kitchen Chairs
- Minimal Prep: Chalk paint often requires minimal prep, but it’s still important to clean your chairs thoroughly.
- Apply the Paint: Apply the chalk paint with a brush, using long, even strokes. Chalk paint is very thick, so don’t worry about getting a perfectly smooth finish.
- Distress (Optional): Once the paint is dry, use sandpaper to distress the edges and details of the chair. This will give it a vintage or shabby chic look.
- Seal the Paint: Chalk paint must be sealed with wax or varnish to protect it from wear and tear. Apply the sealant according to the manufacturer’s instructions.
Painting Metal Kitchen Chairs
- Choose the Right Paint: Use a paint specifically designed for metal, such as a rust-resistant enamel or spray paint.
- Prepare the Surface: Remove any rust with a wire brush or sandpaper. Clean the chairs thoroughly to remove any grease or dirt.
- Prime (Recommended): Apply a metal primer to help the paint adhere better and prevent rust.
- Paint: Apply the paint in thin, even coats, allowing each coat to dry completely before applying the next.
Adding a Protective Finish
A topcoat will protect your painted chairs from scratches, stains, and wear and tear. Here are some options:
- Polyurethane: A durable, water-resistant finish that is available in gloss, satin, and matte sheens.
- Polyacrylic: Similar to polyurethane, but water-based and less likely to yellow over time.
- Wax: Provides a soft, matte finish and is easy to apply. However, it’s not as durable as polyurethane or polyacrylic.
Apply the topcoat according to the manufacturer’s instructions. Use a brush or a spray can to apply thin, even coats. Allow each coat to dry completely before applying the next.
Easy Kitchen Chair Makeover Ideas
- Two-Tone Chairs: Paint the legs and seat of the chair different colors for a modern look.
- Ombre Effect: Create a gradient effect by gradually changing the color of the chair from top to bottom.
- Stenciled Designs: Use stencils to add patterns or designs to the chairs.
- Upholstered Seats: Add new fabric to the seats for a fresh, comfortable look.
- Distressed Finish: Sand the edges and details of the chairs to create a vintage or shabby chic look.
Interpreting Common Painting Problems
| Problem | Possible Cause | Solution |
|---|---|---|
| Paint drips or runs | Applying too much paint at once. | Sand down the drips or runs, and apply thinner coats of paint. |
| Uneven paint coverage | Not applying enough paint, or using a poor-quality brush or roller. | Apply additional coats of paint, and use a high-quality brush or roller. |
| Paint peeling | Poor surface preparation, using the wrong type of paint, or painting over a dirty surface. | Thoroughly prepare the surface, use the correct type of paint, and clean the surface before painting. |
| Brush strokes visible | Using a low-quality brush, or not applying the paint smoothly. | Use a high-quality brush, and apply the paint in long, even strokes. Consider using a paint conditioner. |
| Paint not adhering | Glossy surface, not sanding properly, or not using primer. | Sand the surface to create a better grip, use primer before painting. |
Frequently Asked Questions (FAQ)
- What is the best way to clean kitchen chairs before painting? Soap and water is a great place to start. If your chairs have a lot of grime or grease, use a degreaser. Rinse well and let dry completely.
- Can I paint kitchen chairs without sanding? Yes, you can. Use a liquid deglosser to dull the surface and improve adhesion. Chalk paint and some paints with built-in primers are also good options.
- Who should use a paint sprayer? People who want a super smooth finish quickly. Make sure you have proper ventilation when using one, and follow the manufacturer’s directions carefully.
- What is the best paint for kitchen chairs that will be used frequently? Durable paints such as latex or oil-based paints are best for high-traffic areas. Apply a protective topcoat for added durability.
- How long does it take to paint kitchen chairs? The time it takes depends on the complexity of the project. Allow at least a weekend for cleaning, sanding, painting, and drying.
- What are some easy kitchen chair makeover ideas? Two-tone paint jobs, ombre effects, stenciled designs, and new seat upholstery are some easy ways to update your kitchen chairs.
Painting your kitchen chairs is such a satisfying project that can totally change the look of your room. If you follow these tips, you can get a finish that looks like a pro did it, and it will last for years. So go ahead, grab your supplies, pick out your favorite colors, and get ready to give your chairs a fresh new vibe!

Hi, I’m Larry Fish, the mind behind MyGrinderGuide.com.. With a passion for all things kitchen appliances, I created this blog to share my hands-on experience and expert knowledge. Whether it’s helping you choose the right tools for your culinary adventures or offering tips to make your kitchen more efficient, I’m here to guide you. My goal is to make your time in the kitchen not only easier but also enjoyable! Welcome to my world of kitchen mastery!