
What is kitchen staging? Kitchen staging is preparing your kitchen to appeal to the broadest range of buyers, helping them envision themselves living and cooking in the space. It’s about highlighting the kitchen’s best features and minimizing its flaws to help your home sell faster and for a better price. The following article discusses detailed kitchen staging tips, home staging kitchen strategies, kitchen staging ideas, and how to approach staging a kitchen for sale.
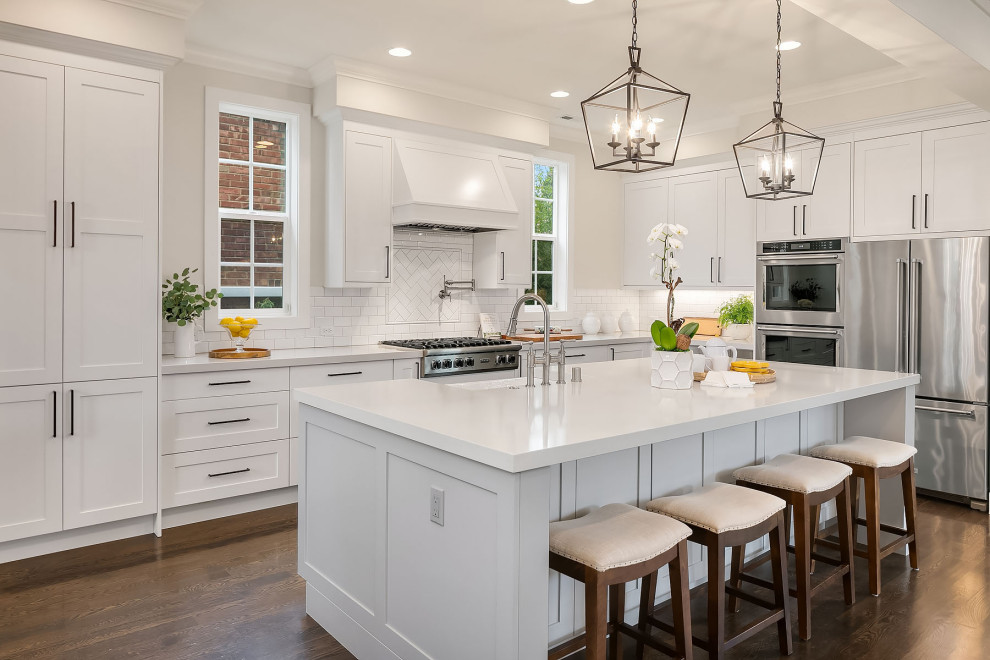
Image Source: www.stagemyownhome.com
The Power of a Staged Kitchen
Most people see the kitchen as the heart of the home. It’s the spot where we cook, hang out with family, and make memories. Since it’s such a key part of the house, staging it well can really impress buyers. It shows off the best parts of the room, makes it feel bigger, and helps people picture themselves living there. Plus, a great-looking kitchen can make your home seem more valuable, helping you sell it faster and for a better price.
Why Kitchen Staging Matters
A staged kitchen tells a story of a well-cared-for, functional, and inviting space. Here’s why it’s so vital:
- First Impressions: The kitchen is one of the first places buyers focus on. A positive first impression can set the tone for the entire viewing.
- Emotional Connection: Staging helps buyers imagine themselves cooking, entertaining, and living in the kitchen.
- Highlighting Features: Staging showcases the kitchen’s best aspects, like updated appliances, ample counter space, or natural light.
- Increased Value: A well-staged kitchen can justify a higher asking price.
- Faster Sale: Homes with staged kitchens tend to sell faster than those that are not staged.
Stage 1: Deep Cleaning and Decluttering
Before any decorating or arranging can take place, a thorough cleaning and decluttering are essential. This is the foundation for successful declutter kitchen staging.
Decluttering: Less is More
Decluttering is the first and most crucial step. Buyers need to see the kitchen’s potential, not your everyday clutter.
- Clear Countertops: Remove everything except for a few carefully chosen decorative items. Appliances like toasters, blenders, and coffee makers should be stored away. Aim for a clean, minimalist look.
- Empty Cabinets and Drawers: Organize and pare down the contents of your cabinets and drawers. Potential buyers may open these to assess storage space. Keep only the essentials and organize them neatly. Donate or discard unwanted items.
- Remove Personal Items: Take down personal photos, magnets, and anything else that might distract buyers from envisioning themselves in the space.
- Address the Refrigerator: Remove magnets, drawings, and notes from the refrigerator. Clean the exterior thoroughly.
Deep Cleaning: Sparkle and Shine
After decluttering, it’s time to deep clean the entire kitchen. A sparkling clean kitchen creates a positive impression of care and maintenance.
- Clean Appliances: Thoroughly clean all appliances, including the oven, stovetop, microwave, refrigerator, and dishwasher. Pay special attention to removing grease and grime.
- Clean Countertops and Backsplash: Scrub countertops and backsplash to remove stains and dirt. Pay attention to grout lines.
- Clean Cabinets: Wipe down cabinet doors and hardware.
- Wash the Sink: Scrub the sink and polish the faucet.
- Sweep and Mop the Floor: Sweep and mop the floor to remove dirt and debris.
- Clean Windows and Mirrors: Clean windows and mirrors to maximize natural light and make the space feel brighter.
- Empty Trash Cans: Ensure trash cans are empty and clean.
- Eliminate Odors: Get rid of any unpleasant odors by airing out the kitchen and using odor neutralizers.
Stage 2: Repairs and Minor Upgrades
Addressing necessary repairs and making minor upgrades can significantly enhance the kitchen’s appeal without breaking the bank. This section is about affordable kitchen staging.
Fixing What’s Broken
Repairing broken or malfunctioning items shows buyers that the home is well-maintained.
- Repair Leaks: Fix any leaky faucets or pipes.
- Replace Broken Hardware: Replace broken cabinet knobs, drawer pulls, or hinges.
- Repair Damaged Tiles: Replace cracked or damaged tiles on the backsplash or floor.
- Fix Appliances: Repair any malfunctioning appliances, or consider replacing them if they are outdated and beyond repair.
Strategic Upgrades for Maximum Impact
Small, strategic upgrades can make a big difference in the kitchen’s appearance.
- Paint the Walls: A fresh coat of paint in a neutral color can brighten the space and make it feel more modern.
- Update Lighting: Replace outdated light fixtures with modern, energy-efficient options. Good lighting can transform the ambiance of the kitchen.
- Replace Faucet: A new faucet can instantly update the sink area.
- Add a Backsplash: If your kitchen lacks a backsplash, consider adding one. A simple tile backsplash can add visual interest and protect the walls.
- New Cabinet Hardware: Swapping out old cabinet hardware for new, stylish knobs and pulls is a cost-effective way to refresh the look of your cabinets.
Stage 3: Arranging and Decorating
Once the kitchen is clean, decluttered, and repaired, it’s time to arrange and decorate to create an inviting and appealing space. This is where kitchen staging ideas come to life.
Focusing on Countertops
The goal is to create a clean, uncluttered, and inviting space that showcases the kitchen’s functionality. Here’s how to stage kitchen countertops:
- Keep it Minimalist: As mentioned before, less is more. Clear most items from the countertops to make the space feel larger and more open.
- Create Vignettes: Arrange a few carefully chosen decorative items to create visual interest. For example, a vase of fresh flowers, a bowl of fruit, or a stack of cookbooks can add warmth and personality.
- Consider Functionality: Include a few functional items that are also aesthetically pleasing. For example, a wooden cutting board, a set of measuring cups, or a stylish utensil holder can add a touch of practicality.
- Balance: Ensure that the countertop arrangement is balanced and visually appealing. Avoid overcrowding one area while leaving another area completely bare.
Setting the Scene
Think about the story you want to tell with your kitchen staging.
- Create a Welcoming Atmosphere: Add elements that make the kitchen feel warm and inviting, such as a small rug, a plant, or a bowl of fresh lemons.
- Set the Table: If you have a kitchen table or island, set it with attractive dishes, silverware, and glasses. This helps buyers imagine themselves enjoying meals in the space.
- Add Color and Texture: Incorporate pops of color and texture through decorative items, such as colorful dish towels, a patterned rug, or a ceramic vase.
- Use Natural Light: Maximize natural light by opening curtains and blinds. If the kitchen is dark, consider adding additional lighting.
Strategic Appliance Placement
How you position appliances can influence the flow and perception of space.
- Clear Pathways: Ensure there’s ample space to move around the kitchen without bumping into appliances.
- Highlight Features: Position appliances to showcase their best features. For example, if you have a stainless steel refrigerator, make sure it’s prominently displayed.
- Conceal Clutter: If possible, conceal smaller appliances like toasters and blenders in cabinets when not in use.
- Consider Symmetry: Arrange appliances in a symmetrical pattern to create a sense of balance and order.
Stage 4: The Finishing Touches
These final touches can elevate your kitchen staging from good to great.
Lighting: Brighten Up the Space
Good lighting is essential for creating a bright, inviting kitchen.
- Maximize Natural Light: Open curtains and blinds to let in as much natural light as possible.
- Add Task Lighting: Install task lighting under cabinets to illuminate countertops and work areas.
- Use Ambient Lighting: Use ambient lighting, such as pendant lights or recessed lighting, to create a warm and inviting atmosphere.
- Choose the Right Bulbs: Use warm, soft white light bulbs to create a cozy and inviting ambiance.
Scent: Appeal to the Senses
A pleasant scent can create a positive impression and make the kitchen feel more welcoming.
- Bake Something: The smell of freshly baked cookies or bread can create a warm and inviting atmosphere.
- Use Air Fresheners: Use subtle air fresheners or essential oil diffusers to create a pleasant scent.
- Avoid Strong Scents: Avoid using strong or overpowering scents, as they can be off-putting to some buyers.
Final Walk-Through: A Critical Eye
Before showing your home, do a final walk-through to ensure that everything is in place and looks its best.
- Check for Clutter: Make sure all surfaces are clean and uncluttered.
- Adjust Lighting: Adjust the lighting to create the desired ambiance.
- Address Odors: Make sure the kitchen smells fresh and clean.
- Straighten Up: Straighten up any rugs or towels that may be out of place.
Before and After: Visualizing the Impact
Seeing kitchen staging before and after photos can be incredibly motivating and illustrate the dramatic impact that staging can have on a kitchen’s appearance.
Example Scenario
- Before: Cluttered countertops with numerous appliances, outdated cabinets, dim lighting.
- After: Clean, minimalist countertops with a few decorative items, freshly painted cabinets, updated lighting.
Documenting the Process
Take before and after photos of your kitchen staging project to track your progress and showcase the transformation to potential buyers.
Creating a Kitchen Staging Checklist
Having a kitchen staging checklist will help you stay organized and ensure that you don’t miss any important steps.
Sample Checklist
| Task | Status | Notes |
|---|---|---|
| Declutter Countertops | Completed | Removed all small appliances. |
| Clean Appliances | Completed | Oven, microwave, refrigerator cleaned thoroughly. |
| Repair Leaks | In Progress | Waiting for plumber. |
| Paint Walls | Completed | Used neutral color. |
| Update Lighting | Completed | Installed new pendant lights. |
| Stage Countertops | Completed | Vase of flowers, bowl of fruit. |
| Set Table (if applicable) | Completed | |
| Final Walk-Through | To Do |
Grasping the Investment
While professional staging can be costly, affordable kitchen staging is achievable with some DIY effort.
DIY vs. Professional Staging
- DIY Staging: Involves tackling the staging process yourself using your own resources and creativity.
- Professional Staging: Involves hiring a professional stager to assess your kitchen and create a staging plan.
Cost-Effective Strategies
- Repurpose Existing Items: Use existing furniture and decor to stage the kitchen.
- Shop Thrift Stores: Look for affordable decorative items at thrift stores and consignment shops.
- DIY Projects: Tackle small DIY projects, such as painting cabinets or adding a backsplash, to update the kitchen’s look.
- Focus on Key Areas: Prioritize staging the areas that will have the biggest impact, such as the countertops and the table.
Fathoming the Return on Investment
The return on investment (ROI) for kitchen staging can be substantial.
Increased Sale Price
A well-staged kitchen can justify a higher asking price, potentially leading to a greater profit on the sale of your home.
Faster Sale
Homes with staged kitchens tend to sell faster than those that are not staged, saving you time and money.
Positive Buyer Perception
Staging creates a positive buyer perception of your home, making it more appealing and memorable.
Maximize Kitchen Appeal: Key Takeaways
To maximize kitchen appeal, remember these key takeaways:
- Declutter and Clean: A clean, uncluttered kitchen is essential.
- Repair and Upgrade: Address necessary repairs and make strategic upgrades.
- Arrange and Decorate: Arrange countertops and set the scene to create an inviting atmosphere.
- Lighting and Scent: Pay attention to lighting and scent to create a positive impression.
- Final Walk-Through: Do a final walk-through to ensure everything looks its best.
By following these steps, you can transform your kitchen into a stunning selling point and increase the chances of a successful home sale.
Frequently Asked Questions (FAQ)
Q: Do I need to hire a professional stager?
A: No, you don’t always need a professional. DIY staging can be effective, especially if you follow the tips outlined in this guide. However, a professional stager can provide valuable expertise and a fresh perspective.
Q: What if I have outdated appliances?
A: If your appliances are old and worn, consider replacing them if your budget allows. If not, focus on cleaning them thoroughly and highlighting other positive aspects of the kitchen.
Q: How much should I spend on kitchen staging?
A: The amount you spend on kitchen staging depends on your budget and the condition of your kitchen. Focus on cost-effective improvements that will have the biggest impact.
Q: Can I stage my kitchen if it’s small?
A: Yes, even small kitchens can benefit from staging. Focus on decluttering, maximizing natural light, and using space-saving storage solutions.
Q: What colors are best for kitchen staging?
A: Neutral colors, such as white, beige, and gray, are generally the best choices for kitchen staging, as they appeal to a wide range of buyers.

Hi, I’m Larry Fish, the mind behind MyGrinderGuide.com.. With a passion for all things kitchen appliances, I created this blog to share my hands-on experience and expert knowledge. Whether it’s helping you choose the right tools for your culinary adventures or offering tips to make your kitchen more efficient, I’m here to guide you. My goal is to make your time in the kitchen not only easier but also enjoyable! Welcome to my world of kitchen mastery!