
Is your Moen kitchen faucet acting up with a leak, a loose handle, or just a constant, annoying drip? The good news is that you can definitely fix it yourself! This guide will show you how to handle the most common issues, which will save you a trip from the plumber and some cash. We’ll walk through how to swap out the cartridge, replace old O-rings, tighten up a wobbly handle, and figure out exactly what’s causing the trouble. Let’s get to work and get that faucet back in shape!
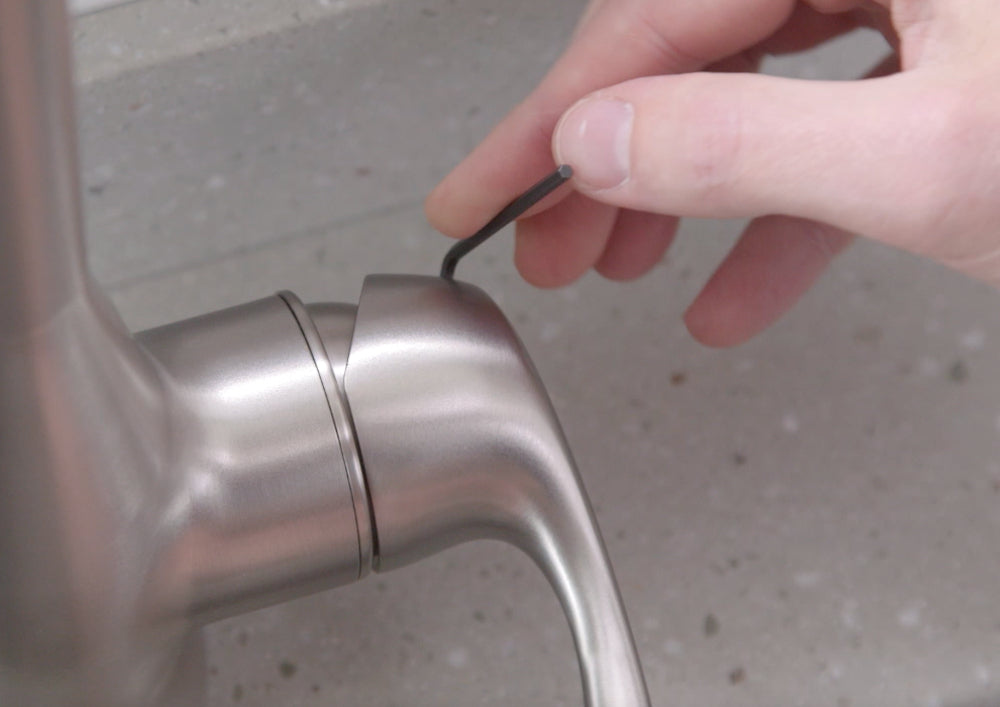
Image Source: shop.moen.com
Diagnosing Common Moen Faucet Problems
Before you start taking things apart, let’s figure out what’s causing the issue. This will help you choose the right fix and the correct Moen faucet parts.
Kitchen Faucet Leaking: The Drip-Drip-Drip Menace
A leaky faucet is the most common complaint. Where the leak is coming from tells you what’s wrong.
- Leak from the spout: This usually means a worn-out cartridge.
- Leak around the base of the faucet: This can be caused by worn o-rings or a loose faucet body.
- Leak under the sink (supply lines): Check the connections of the water supply lines. Tighten them or replace the lines if necessary.
Faucet Handle Loose: Wobbly Woes
A loose faucet handle makes it hard to control the water flow and can eventually damage other parts.
- Handle feels wobbly: The set screw on the handle might be loose.
- Handle comes completely off: The set screw might be missing.
Fix Moen Faucet Drip: The Persistent Plink
A dripping faucet wastes water and can be incredibly annoying.
- Constant drip, even when fully closed: This is almost always a cartridge problem.
Other Common Problems
- Reduced water flow: A clogged aerator or debris in the cartridge can reduce water flow.
- No hot or cold water: The cartridge might be stuck or blocked.
Safety First: Preparation Before You Start
Before you begin any plumbing repair, safety is key.
- Turn Off the Water: Locate the shut-off valves under your sink. Turn both the hot and cold water valves clockwise until they are completely closed.
- Release Pressure: Open the faucet to release any remaining water pressure in the lines.
- Protect Your Sink: Place a towel or cloth in the sink to prevent scratches and protect dropped parts.
- Gather Your Tools: Having the right tools makes the job much easier. You will likely need:
- Screwdrivers (Phillips and flathead)
- Adjustable wrench
- Allen wrench (various sizes)
- Pliers
- Moen cartridge puller (optional, but helpful)
- White vinegar (for cleaning)
- Plumber’s grease (silicone-based)
- Consult a Moen Faucet Parts Diagram: This will help you identify the specific parts of your faucet and their location. Moen’s website provides diagrams based on model numbers.
Moen Faucet Disassembly: A Step-by-Step Guide
This section outlines the general steps for taking apart a Moen kitchen faucet. Specific details may vary depending on your faucet model, so always refer to a Moen faucet parts diagram for your specific model.
Removing the Handle
- Locate the Set Screw: Look for a small set screw on the side or underside of the handle. It might be hidden under a decorative cap that you can pry off with a small screwdriver.
- Loosen the Set Screw: Use an Allen wrench to loosen the set screw. Turn it counterclockwise.
- Remove the Handle: Once the set screw is loose, you should be able to pull the handle straight off.
Accessing the Cartridge
- Remove the Handle Base/Escutcheon: Depending on your faucet model, there might be a decorative base or escutcheon covering the cartridge. Unscrew or gently pry this off.
- Remove the Retaining Clip: You should now see a U-shaped retaining clip holding the cartridge in place. Use pliers or a screwdriver to carefully remove this clip. Note the direction the clip is facing before removing it to ensure correct reinstallation.
- Pulling the Cartridge: This can sometimes be the trickiest part. The cartridge can become stuck over time due to mineral buildup.
- Use a Cartridge Puller: A Moen cartridge puller tool is designed specifically for this purpose. Follow the tool’s instructions to grip and pull the cartridge straight out.
- Manual Removal: If you don’t have a puller, try gripping the cartridge stem with pliers and gently twisting and pulling. Be careful not to break the stem.
- Soaking in Vinegar: If the cartridge is stuck, try soaking the area around it with white vinegar. Let it sit for 30 minutes to an hour to dissolve mineral deposits.
Moen Cartridge Replacement: The Heart of the Faucet
The cartridge controls water flow and temperature. Replacing it is often the solution to leaks and drips.
- Identify the Correct Cartridge: Moen cartridges come in different sizes and designs. Knowing your faucet model number is crucial for getting the right replacement. You can find this number on the original packaging or on the faucet itself (usually under the sink).
- Install the New Cartridge:
- Lubricate: Apply a thin coat of plumber’s grease (silicone-based) to the o-rings on the new cartridge. This helps with installation and prevents leaks.
- Align: Line up the cartridge with the faucet body. There’s usually a specific orientation (look for markings on the cartridge or faucet body).
- Push: Push the cartridge firmly into place until it’s fully seated.
- Reinstall the Retaining Clip: Put the U-shaped retaining clip back in place, making sure it’s securely seated in the groove.
- Reassemble the Faucet: Reinstall the handle base/escutcheon and the handle. Tighten the set screw on the handle.
Replacing Faucet O-Rings: Sealing the Deal
Worn o-rings can cause leaks around the base of the faucet or where different parts connect.
- Locate the O-Rings: O-rings are small, rubbery rings that seal joints between faucet parts. Common locations include:
- Under the spout
- Around the base of the faucet body
- Inside the cartridge housing
- Remove the Old O-Rings: Use a small screwdriver or pick to carefully pry off the old o-rings. Be careful not to scratch the surrounding metal.
- Install the New O-Rings:
- Lubricate: Apply a thin coat of plumber’s grease to the new o-rings.
- Stretch and Seat: Stretch the o-ring slightly and roll it into place on the groove. Make sure it’s seated evenly.
Faucet Handle Loose: Tightening Things Up
Fixing a loose handle is usually a quick and easy task.
- Tighten the Set Screw: If the handle feels wobbly, simply tighten the set screw with an Allen wrench. Be careful not to overtighten, as this can strip the screw.
- Replace the Set Screw: If the set screw is missing, purchase a replacement set screw of the correct size and thread.
- Check the Handle Base: If the handle base or escutcheon is loose, tighten the screws or nuts that hold it in place.
Moen Faucet Troubleshooting: When Things Go Wrong
Even with careful repair, problems can sometimes arise.
- Faucet still leaks after cartridge replacement: Double-check that you installed the correct cartridge and that it’s fully seated. Make sure the retaining clip is properly in place. Inspect the faucet body for cracks or damage.
- Reduced water flow after repair: Clean the aerator (the screen at the end of the spout). Debris can accumulate during the repair process.
- Handle is difficult to turn: Make sure you lubricated the cartridge and o-rings properly.
Tips for Prolonging Faucet Life
- Clean Regularly: Wipe down your faucet with a mild soap and water solution to prevent mineral buildup.
- Don’t Overtighten: Overtightening handles or screws can damage the faucet.
- Use the Correct Tools: Using the right tools prevents damage to the faucet and makes repairs easier.
- Install a Water Softener: Hard water can cause mineral buildup and shorten the life of your faucet.
- Consider Professional Help: If you’re not comfortable with DIY repairs or if the problem is complex, call a qualified plumber.
Moen Kitchen Faucet Parts Diagram: Visual Aid
A Moen faucet parts diagram is a valuable tool for identifying and understanding the components of your faucet. You can find diagrams specific to your faucet model on the Moen website or through online retailers.
| Part | Description | Common Issues |
|---|---|---|
| Handle | Controls water flow and temperature. | Loose, broken, difficult to turn |
| Set Screw | Secures the handle to the faucet stem. | Missing, stripped |
| Escutcheon/Handle Base | Decorative cover that conceals the cartridge and faucet body. | Loose, cracked |
| Cartridge | Controls the mixing of hot and cold water. | Leaking, dripping, no hot/cold water |
| Retaining Clip | Holds the cartridge in place. | Missing, broken |
| Spout | The outlet for the water. | Leaking, reduced flow (clogged aerator) |
| O-Rings | Seals joints between parts to prevent leaks. | Worn, cracked, causing leaks around the base/spout |
| Aerator | Screws into the spout and mixes air with the water flow. | Clogged, reduced water pressure |
| Supply Lines | Connect the faucet to the hot and cold water supply. | Leaking, corroded |
Conclusion
With this Moen faucet repair guide, you can tackle common faucet problems yourself. By following these steps for Moen cartridge replacement, replacing faucet o-rings, and addressing loose handles, you can save money and extend the life of your Moen kitchen faucet. Remember to always prioritize safety and consult a Moen faucet parts diagram for your specific model. Now you can confidently fix Moen faucet drip issues and more!
Frequently Asked Questions (FAQ)
What is the most common reason for a Moen faucet to leak? The most common reason is a worn-out cartridge.
Can I replace a Moen cartridge myself? Yes, you can replace a Moen cartridge yourself with the right tools and instructions. This guide provides a step-by-step process.
Who is the best person to call for Moen faucet repair if I can’t do it myself? A licensed plumber is the best person to call if you are not comfortable doing the repair yourself.
How do I identify my Moen faucet model number? Look for the model number on the original packaging, the faucet itself (often under the sink), or on your purchase receipt.
Where can I buy replacement parts for my Moen faucet? You can buy replacement parts at most hardware stores, plumbing supply stores, or online retailers. Moen’s website also sells replacement parts.
How often should I replace the cartridge in my Moen faucet? Depending on water quality and usage, a Moen faucet cartridge should last 5-10 years. Replace it when you notice leaks or drips.
What type of grease should I use on my faucet parts? Use a silicone-based plumber’s grease to lubricate o-rings and cartridges. Petroleum-based grease can damage rubber parts.
Is it worth repairing a Moen faucet, or should I just replace it? It depends on the age and condition of the faucet. If the faucet is relatively new and the problem is a simple fix like a cartridge replacement, it’s usually worth repairing. However, if the faucet is old, corroded, or has multiple problems, it might be better to replace it.

Hi, I’m Larry Fish, the mind behind MyGrinderGuide.com.. With a passion for all things kitchen appliances, I created this blog to share my hands-on experience and expert knowledge. Whether it’s helping you choose the right tools for your culinary adventures or offering tips to make your kitchen more efficient, I’m here to guide you. My goal is to make your time in the kitchen not only easier but also enjoyable! Welcome to my world of kitchen mastery!