
Does your refrigerator door feel a little loose? Maybe you’ve noticed a chill escaping, or your food just isn’t staying as cold as it should. A leaky refrigerator door gasket is a common problem, and fixing it often means finding the perfect adhesive. But where do you even start? The world of glues and sealants can be confusing, and picking the wrong one can lead to more trouble than it’s worth.
Choosing the right adhesive for your refrigerator door gasket matters. You need something strong enough to hold tight, flexible enough to move with the door, and safe to use around food. Get it wrong, and you might end up with a sticky mess, a gasket that falls off again, or worse, something that could harm your food. This can be frustrating and costly.
But don’t worry! By the end of this post, you’ll understand exactly what to look for in an adhesive. We’ll break down the best options, explain why they work, and give you the confidence to tackle this repair yourself. Get ready to seal that leak and keep your fridge running efficiently!
Our Top 5 Adhesive For Refrigerator Door Gasket Recommendations at a Glance
| Image | Product | Rating | Links |
|---|---|---|---|
 |
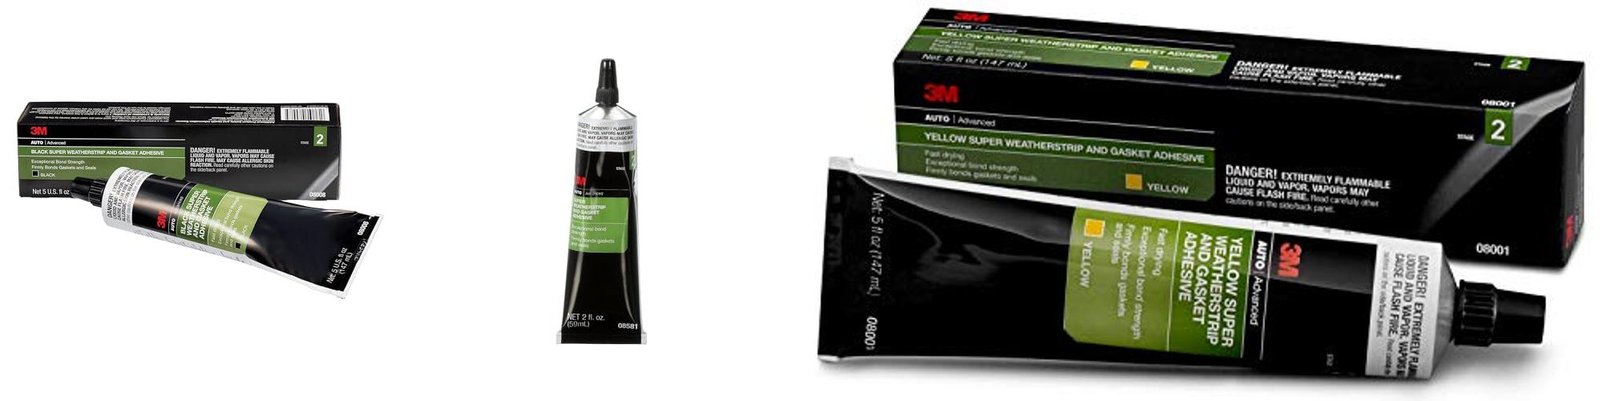
3M Black Super Weatherstrip and Gasket Adhesive | 8.9/10 | Check Price |
 |
3M Super Weatherstrip and Gasket Adhesive | 8.7/10 | Check Price |
 |
3M Super Weatherstrip and Gasket Adhesive | 8.9/10 | Check Price |
 |
3M Black Super Weatherstrip and Gasket Adhesive 03602 | 9.3/10 | Check Price |
 |
Wood Stove Door Gasket Cement | 9.0/10 | Check Price |
Top 5 Adhesive For Refrigerator Door Gasket Detailed Reviews
1. 3M Black Super Weatherstrip and Gasket Adhesive
Rating: 8.8/10
Tired of leaky car doors or peeling headliners? The 3M Black Super Weatherstrip and Gasket Adhesive, 08008, is here to help. This powerful adhesive is designed to fix those annoying gaps and keep your vehicle’s interior and exterior in top shape. It’s a go-to for anyone looking for a reliable and long-lasting fix.
What We Like:
- It strongly bonds weatherstripping, headliners, gaskets, and other car parts.
- It creates a flexible, waterproof seal that can handle shaking and bumps.
- The easy-to-use tube lets you brush and spread the adhesive without a mess, saving you time.
- It stands up to oil, solvents, cleaning liquids, and different temperatures for repairs that last.
- It sticks well to many surfaces like vinyl, metal, cloth, and rubber.
What Could Be Improved:
- The 5 fl oz size might be small for very large repair jobs.
- The black color may not blend in with lighter-colored materials.
Overall, this 3M adhesive is a fantastic tool for keeping your car sealed and looking good. It makes tough repairs simple and dependable.
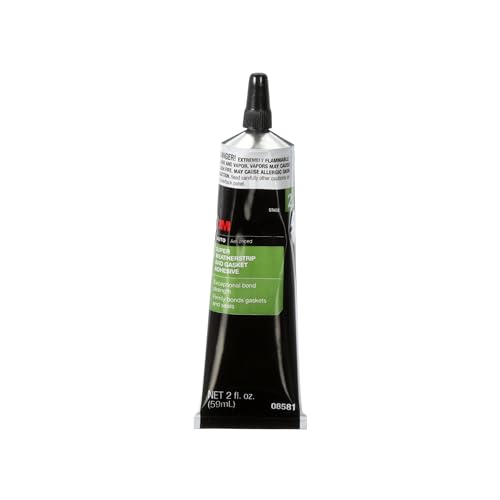
2. 3M Super Weatherstrip and Gasket Adhesive
Rating: 9.4/10
The 3M Super Weatherstrip and Gasket Adhesive is a handy tool for fixing things around your home or car. This black adhesive comes in a small 2 fl oz tube and is designed to create a strong, lasting bond. It’s great for weatherstripping and gaskets.
What We Like:
- It makes a flexible, waterproof seal. This seal can handle shaking and won’t let water through.
- You can easily brush and spread it straight from the tube. This saves you time and effort.
- It stands up to oils, solvents, and cleaning stuff. It also works well even when temperatures change. This means your repairs last a long time.
- It sticks to many different materials. This includes things like vinyl, metal, cloth, and rubber.
What Could Be Improved:
- The tube is pretty small. For bigger jobs, you might need more than one.
- The drying time can be a little long. You need to be patient and let it fully set.
This adhesive is a reliable choice for many repair tasks. It provides a strong, waterproof fix that keeps things working well.
3. 3M Super Weatherstrip and Gasket Adhesive
Rating: 9.4/10
Fixing those annoying drafts or worn-out seals just got a whole lot easier with the 3M Super Weatherstrip and Gasket Adhesive. This yellow adhesive comes in a convenient 5 fl oz tube, perfect for tackling various repair jobs around your home or vehicle. It’s designed to create a strong, lasting bond.
What We Like:
- It bonds weatherstripping, headliners, gaskets, and more.
- It forms a flexible, waterproof bond. This bond resists vibration, which is great for moving parts.
- It’s easy to brush and spread right from the tube. This saves you time on your projects.
- It resists oils, solvents, detergents, and temperature changes. This means your repairs will last.
- It bonds to many surfaces like vinyl, metal, fabrics, and rubber.
What Could Be Improved:
- The 5 fl oz tube might be a bit small for very large projects.
- The yellow color might be visible on some light-colored materials if not applied carefully.
This 3M adhesive is a reliable choice for anyone needing to make durable repairs. It offers a strong, flexible, and waterproof seal that stands up to tough conditions.
4. 3M Black Super Weatherstrip and Gasket Adhesive 03602
Rating: 9.3/10
Tired of leaks and drafts in your car? The 3M Black Super Weatherstrip and Gasket Adhesive 03602 is your go-to solution. This powerful, waterproof glue is specifically designed to keep your rubber seals and gaskets in top shape. It’s perfect for fixing car doors, windows, trunks, and even sunroofs. This adhesive creates a strong bond that stands up to tough weather, keeping your car protected from rain, wind, and noise.
What We Like:
- Bonds rubber to metal for strong, waterproof seals on car doors, trunks, and more.
- Works great in all kinds of weather, resisting heat, cold, and oils.
- Easy to apply right from the tube, no special tools needed.
- Cures quickly, holding seals in place without clamping.
- Versatile for many car repairs, like fixing door seals or interior trim.
- Dries black for a clean, factory-like look that blends in.
What Could Be Improved:
- The 1 fl oz tube might be small for very large repair jobs.
- While easy to use, a bit of practice might be needed for perfect results on intricate areas.
This 3M adhesive provides a professional, long-lasting fix for your car’s weather seals. You can trust it to keep your vehicle protected and looking great.
5. Wood Stove Door Gasket Cement
Rating: 9.0/10
Keep your wood stove burning efficiently and safely with this high-temperature resistant gasket cement. This black, 3.5 fl oz adhesive is made from durable silicone and is designed to withstand extreme heat, making it ideal for repairing and replacing wood stove door gaskets. It’s a straightforward solution for maintaining a tight seal on your stove.
What We Like:
- It handles heat well, up to 500°F (260°C).
- You can use it for many things.
- It sticks fiberglass wood stove gasket ropes to doors easily.
- The material is good quality silicone. It is waterproof and safe.
- It doesn’t have a strong smell and is low in VOCs (volatile organic compounds).
- It can fix cracks in metal and stick metal to metal.
- It also works for sticking bricks, stones, and concrete.
- Once it dries, it stays strong and doesn’t crack or break.
What Could Be Improved:
- The instructions could be a little clearer for first-time users.
- More color options might be nice for different stove aesthetics.
This gasket cement offers a reliable and versatile way to ensure your wood stove is properly sealed. It’s a practical choice for anyone looking to maintain their heating appliance effectively.
Fix Your Fridge Seal: The Ultimate Buying Guide for Refrigerator Door Gasket Adhesive
Is your refrigerator door letting in warm air? A worn-out or leaky gasket is usually the culprit. Don’t worry, fixing it is often a simple DIY job with the right adhesive! This guide will help you choose the best glue to make your fridge seal like new again.
Why You Need the Right Adhesive
A good refrigerator gasket seal keeps your food cold and your energy bills down. When the gasket pulls away, cold air escapes, making your fridge work harder. This wastes electricity and can lead to spoiled food. A strong, flexible adhesive can reattach your gasket, saving you money and frustration.
Key Features to Look For
When you’re shopping for refrigerator gasket adhesive, keep these important features in mind:
- Flexibility: The gasket needs to bend and seal tightly. Your adhesive must stay flexible too, so it doesn’t crack or peel when the door opens and closes.
- Water Resistance: Fridges can get steamy inside. The adhesive needs to handle moisture without breaking down.
- Temperature Resistance: It should work in cold temperatures and not get brittle. It also needs to withstand the warmer temperatures near the door.
- Fast Drying Time: You want to fix your fridge quickly. A fast-drying adhesive means less downtime.
- Non-Toxic & Food Safe (if applicable): While the adhesive isn’t directly touching food, it’s a good idea to look for options that are safe to use in a food environment.
- Strong Bond: The glue must create a lasting connection between the gasket and the fridge frame.
Important Materials to Consider
The type of material your gasket is made from can influence the best adhesive choice. Most refrigerator gaskets are made of rubber or vinyl.
- Rubber Gaskets: These are common and flexible. Many types of rubber-specific adhesives work well.
- Vinyl Gaskets: Vinyl is also flexible. Look for glues that are specifically designed for vinyl or flexible plastics.
Some adhesives use silicone, while others are based on synthetic rubber compounds. Silicone-based adhesives are often very flexible and waterproof. Synthetic rubber adhesives offer strong bonding power. Always check the product label to see what materials it’s designed to bond.
Factors That Improve or Reduce Quality
Several things can make your adhesive work better or worse.
- Surface Preparation is Key:
- Cleaning: You must clean both the gasket and the fridge frame thoroughly. Dirt, grease, and old adhesive will stop the new glue from sticking. Use rubbing alcohol or a mild cleaner. Make sure everything is dry before applying the adhesive.
- Dryness: Applying glue to a wet surface is a recipe for failure.
- Application Technique Matters:
- Thin, Even Coats: Don’t slather on too much glue. A thin, even layer usually creates a stronger bond. Too much glue can make the seal stiff.
- Proper Clamping (if needed): Some adhesives might require you to hold the gasket in place for a few minutes. If your adhesive suggests it, use painter’s tape or clamps gently to keep the gasket pressed against the frame while it dries.
- Environmental Conditions:
- Temperature: Try to apply the adhesive at room temperature. Very cold or very hot conditions can affect how well the glue dries and bonds.
- Humidity: High humidity can sometimes slow down drying times.
User Experience and Use Cases
Most people use this type of adhesive for simple repairs.
- Reattaching a Loose Gasket: This is the most common use. If a section of your gasket has pulled away from the fridge door, you can glue it back on.
- Repairing Small Tears: Some flexible adhesives can even help seal small nicks or tears in the gasket itself, preventing further damage.
- DIY Appliance Repair: It’s a great way to avoid calling a repair person for a minor issue. This saves you money and time.
The experience is usually straightforward. Clean the area, apply the glue, press the gasket back into place, and let it cure. Many users report success in restoring their fridge’s seal with minimal effort.
Frequently Asked Questions (FAQ)
Q: What is the best type of adhesive for a refrigerator door gasket?
A: The best adhesive is typically a flexible, waterproof, and temperature-resistant glue. Look for options specifically designed for rubber or vinyl, as these are common gasket materials. Silicone-based adhesives or synthetic rubber glues are often good choices.
Q: Can I use super glue on my refrigerator gasket?
A: It’s generally not recommended. Super glue dries very hard and brittle. Refrigerator gaskets need to remain flexible to create a good seal. Super glue will likely crack and fail.
Q: How do I prepare the surface before applying the adhesive?
A: You must clean both the gasket and the fridge frame thoroughly. Remove all dirt, grease, and any old adhesive. Rubbing alcohol works well for cleaning. Make sure both surfaces are completely dry before applying the glue.
Q: How long does it take for the adhesive to dry?
A: Drying times vary by product. Many flexible adhesives for gaskets dry within a few hours, but it’s best to check the product’s instructions. Some may recommend waiting 24 hours for a full cure.
Q: Will the adhesive be visible after I apply it?
A: If applied thinly and neatly, the adhesive should be very discreet. Some adhesives are clear, which helps them blend in. Avoid using too much glue.
Q: Can I use this adhesive to repair a tear in the gasket?
A: Some flexible adhesives can help seal small tears or nicks. Apply a thin bead of glue along the tear and press the edges together. However, for large tears, replacing the gasket might be a better long-term solution.
Q: Is the adhesive safe to use around food?
A: While the adhesive itself won’t be in direct contact with food, it’s always a good idea to choose products that are non-toxic. Once cured, most adhesives used for this purpose are considered safe for use in a kitchen environment.
Q: What if the gasket doesn’t stick after using the adhesive?
A: This usually means the surface wasn’t clean enough, was still wet, or you didn’t apply enough pressure while it dried. You may need to remove the old adhesive and try again, ensuring proper preparation.
Q: Can I use this adhesive on other parts of my refrigerator?
A: It depends on the specific adhesive. Some flexible adhesives might work on other plastic or rubber parts, but always check the product’s intended uses. Don’t use it on electrical components.
Q: Where can I buy refrigerator gasket adhesive?
A: You can find refrigerator gasket adhesive at most hardware stores, home improvement stores, and online retailers like Amazon.
In conclusion, every product has unique features and benefits. We hope this review helps you decide if it meets your needs. An informed choice ensures the best experience.
If you have any questions or feedback, please share them in the comments. Your input helps everyone. Thank you for reading.

Hi, I’m Larry Fish, the mind behind MyGrinderGuide.com.. With a passion for all things kitchen appliances, I created this blog to share my hands-on experience and expert knowledge. Whether it’s helping you choose the right tools for your culinary adventures or offering tips to make your kitchen more efficient, I’m here to guide you. My goal is to make your time in the kitchen not only easier but also enjoyable! Welcome to my world of kitchen mastery!