
Is your refrigerator looking dull, scratched, or just plain outdated? Many of us dream of a kitchen that matches our style, but replacing a perfectly good appliance feels wasteful and expensive. The good news is you don’t have to buy a new fridge to get a fresh look! Painting your refrigerator is a fantastic way to give it a major makeover on a budget.
However, choosing the right paint can feel like a puzzle. You worry about chipping, peeling, and whether the paint will stick to that slick metal surface. Will it look professional, or will it quickly turn into a sticky mess? These concerns stop many people from even trying this fun DIY project. We understand those fears, and that’s why we created this guide.
This post cuts through the confusion. We will show you exactly what kind of paint works best for metal appliances, how to prep the surface correctly, and the simple steps to achieve a smooth, durable finish. By the end of this article, you will have the confidence and knowledge to transform your old fridge into the centerpiece of your kitchen.
Top Paint For Refrigerator Recommendations

- Ideal for refinishing exterior metal surfaces including refrigerators, dishwashers, laundry machines and more
- Epoxy formula creates an ultra hard, washable surface that withstands everyday wear
- Dries to the touch in 2-4 hours and covers approximately 7 sq. ft. per can
- Provides a durable surface with an exceptional glossy shine
- Use on the outside of appliances only; not for immersed surfaces or items exposed to temperatures over 200°F

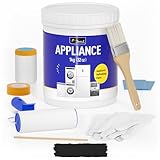
- 【Accessories Complete】This appliance paint kit includes masking tape, film, a roller, sandpaper, gloves, a brush, and a stir rod. Get started right away without needing additional tools, easier and more convenient.
- 【Strong and Sturdy】DWIL refrigerator paint is made from water-based materials engineered to withstand high temperatures and resist daily wear and tear, making your appliances look brand new for longer.
- 【Low Odor and VOCs】We prioritize your comfort. Our fridge paint boasts low odor and volatile organic compounds (VOCs), ideal for indoor use, no side effect for you and your family while refreshing your appliances.
- 【Wide Application】With 32 oz, this paint for appliance can cover 50 square feet in two coats, perfect for rejuvenating the interiors of refrigerators, washing machines, dishwashers, air conditioners, dryers, microwaves, etc.
- 【Fast Drying】The drying time of the paint for fridge is influenced by temperature and humidity. Typically, it dries within 1-2 hours, this might extend on humid or rainy days. After 7 days, it will achieve its full hardness.
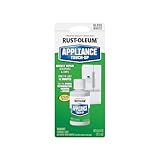
- Ideal for fixing scratches and imperfections on interior metal, porcelain and enamel appliances
- Acrylic lacquer formula dries quickly to create a durable finish on items
- Dries to the touch in 10 minutes and covers between 0.25-0.5 sq. ft. per bottle
- Glossy finish is designed to help match to common appliance colors and finishes
- Use on the outside of appliances only; not for immersed surfaces or items exposed to temperatures over 200°F
- 【Accessories Complete】This appliance paint kit includes masking tape, film, a roller, sandpaper, gloves, a brush, and a stir rod. Get started right away without needing additional tools, easier and more convenient.
- 【Strong and Sturdy】DWIL refrigerator paint is made from water-based materials engineered to withstand high temperatures and resist daily wear and tear, making your appliances look brand new for longer.
- 【Low Odor and VOCs】We prioritize your comfort. Our fridge paint boasts low odor and volatile organic compounds (VOCs), ideal for indoor use, no side effect for you and your family while refreshing your appliances.
- 【Wide Application】With 32 oz, this paint for appliance can cover 50 square feet in two coats, perfect for rejuvenating the interiors of refrigerators, washing machines, dishwashers, air conditioners, dryers, microwaves, etc.
- 【Fast Drying】The drying time of the paint for fridge is influenced by temperature and humidity. Typically, it dries within 1-2 hours, this might extend on humid or rainy days. After 7 days, it will achieve its full hardness.

- 【Accessories Complete】This appliance paint kit includes masking tape, film, a roller, sandpaper, gloves, a brush, and a stir rod. Get started right away without needing additional tools, easier and more convenient.
- 【Strong and Sturdy】DWIL refrigerator paint is made from water-based materials engineered to withstand high temperatures and resist daily wear and tear, making your appliances look brand new for longer.
- 【Low Odor and VOCs】We prioritize your comfort. Our fridge paint boasts low odor and volatile organic compounds (VOCs), ideal for indoor use, no side effect for you and your family while refreshing your appliances.
- 【Wide Application】With 32 oz, this paint for appliance can cover 50 square feet in 2 coats, perfect for rejuvenating the interiors of refrigerators, washing machines, dishwashers, air conditioners, dryers, microwaves, etc.
- 【Fast Drying】The drying time of the paint for fridge is influenced by temperature and humidity. Typically, it dries within 1-2 hours, this might extend on humid or rainy days. After 7 days, it will achieve its full hardness.

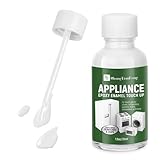
- ✨ Restore Like-New Shine to Faded & Rusted Appliances: Easily repair scratches, rust, and discoloration on fridges, dishwashers, washers, and microwaves with our Black appliance touch up paint—bring back a fresh, like-new look without replacing. This appliance paint Black formula delivers a clean, matte finish perfect for restoring household appliances.
- 💪 Long-Lasting Protection: Engineered for durability, our water-based appliance paint forms a tough, chip-resistant coating that stands up to moisture, scrubbing, and daily wear. Whether you're using it as fridge paint, refrigerator paint, or appliance epoxy paint, it helps appliances stay newer, longer—in the kitchen, laundry room, or RV.
- 🌿 Safe, Water-Based Formula for Indoor Comfort: Formulated with low-VOC, non-toxic ingredients, this Black appliance paint is ideal for indoor use—safe around people and pets. No harsh fumes or mess. Clean-up is easy with soap and water, making it a top choice for appliances repair in enclosed spaces like kitchens and laundry rooms.
- 🏠 Versatile Use for Multiple Appliances & Surfaces: This appliance touch up paint Black adheres to both plastic and metal surfaces, perfect for refrigerators, washers, dryers, dishwashers, ovens, and microwaves. Whether you’re restoring a scratched washer or updating a yellowed fridge panel, our Black paint for metal appliances gives consistent, professional results.
- 🧰 All-in-One Kit for Easy Appliance Repair: Our DIY-friendly kit includes everything you need for quick and precise appliance touch up paint application—brush, gloves, sandpaper, and masking tape. Whether you're doing full appliance refinishing or quick Black appliance touch up, this all-in-one solution has you covered.

- Use to repaint or refurbish interior appliances like refrigerators, laundry machines and more
- Epoxy formula dries to a smooth, hard enamel finish
- Dries enough to be handled in 5-9 hours and covers between 60-120 sq. ft. per can
- Durable epoxy withstands washing and everyday wear
- Creates the look and shine of a smooth epoxy finish
- Quickly restore the gloss of bathtubs, washbasins and tiles: specially designed repaint with excellent adhesion; Portable, fast drying, waterproof; Bathroom porcelain, fiberglass, enamel, acrylic, cast iron, wooden furniture, etc
- High quality adhesion and heat resistance: the unique built-in brush makes your touch up projects a breeze; Has a strong paint adhesion, paint uniform, accurate, no confusion of use; No cracking in warm bath (if used on the inside of the bathtub, it is recommended to wait 48 hours after completely drying)
- High gloss and super durable: Professional and non-slip bath refinish paint white provides a high gloss bath surface; Waterproof, durable, fast drying; The leaf surface is seamless, smooth and flawless for a long handling time
- Safe and low odor: made of water-based acrylic quality formula; Safe for the elderly and children; No odor, ultra-low emission; Ideal for small chips, spots, cracks, scratches
- Safe and guaranteed after-sales service: Your satisfaction is very important to us! If you do not get the results you want from our products, we will provide you with satisfactory results, including restarting your new product or reimbursing you for the full amount of our product purchase.
Painting Your Fridge: The Ultimate Buying Guide
Giving your old refrigerator a fresh coat of paint can totally transform your kitchen. It’s a fun, budget-friendly way to upgrade your space. But you can’t just use any old paint. Fridges are tricky because they get cold and might get bumped often. This guide will help you pick the perfect paint.
Key Features to Look For
When shopping, look for paints that have these important features. These make sure the paint sticks well and lasts a long time on metal surfaces.
Durability and Adhesion
- Strong Grip (Adhesion): The paint must stick tightly to the smooth metal of your fridge. If it doesn’t stick well, it will peel off quickly, especially when the fridge sweats or changes temperature.
- Tough Finish: Look for paints labeled as “appliance” or “enamel.” These finishes resist chips, scratches, and daily wear better than regular wall paint.
Finish and Appearance
- Low Odor: Since the fridge is inside your house, choose low-VOC (Volatile Organic Compounds) or water-based paints. They smell less strong while you paint and dry.
- Sheen Level: Semi-gloss or satin finishes usually look best on appliances. They are easier to wipe clean than flat finishes.
Important Materials: What’s Inside Matters
The type of paint you choose determines how well it works on metal.
Oil-Based vs. Water-Based (Latex)
- Oil-Based (Alkyd) Paints: These used to be the standard. They dry very hard and durable. However, they have strong fumes and clean-up requires mineral spirits.
- Water-Based Acrylic/Latex Paints: Modern, high-quality water-based paints are often better now. Look for specialized acrylic enamels. They clean up easily with soap and water and dry faster. They are usually the safest choice for beginners.
The Crucial Primer
No matter which topcoat you choose, a good primer is essential. The primer acts like super glue between the slick metal and the color paint. Always use a **direct-to-metal (DTM)** or **bonding primer** specifically made for slick surfaces.
Factors That Improve or Reduce Quality
Good preparation makes the paint job look professional. Poor preparation guarantees peeling.
What Improves Quality (Do This!)
- Cleaning: You must remove all grease and dirt. Use a degreaser like TSP substitute or strong dish soap. A clean surface lets the primer stick properly.
- Sanding: Lightly scuffing the old finish with fine-grit sandpaper (around 220 grit) creates tiny scratches. These scratches give the primer something to grab onto.
- Curing Time: Allow the paint to fully harden (cure), not just dry to the touch. This can take several days, especially in humid weather.
What Reduces Quality (Avoid This!)
- Painting Over Rust: If there is rust, the paint will bubble up later. Rust must be completely removed before priming.
- Thick Coats: Applying paint too thickly causes drips and cracks as it dries. Multiple thin coats are always better than one thick coat.
User Experience and Use Cases
Most people paint their fridge to match new cabinets or hide an ugly color. User experiences show that the hardest part is the prep work, not the painting itself.
Best Use Cases:
- Full Color Change: Painting a white fridge black or navy for a modern look.
- Accent Piece: Painting just the side panels or the door handles a bright, fun color.
- Hiding Damage: Covering up old scratches or minor dents where a replacement panel is too expensive.
When you paint, work in a well-ventilated area. Take the doors off if possible; this makes spraying or rolling much easier, leading to a smoother finish.
10 Frequently Asked Questions (FAQ) About Refrigerator Paint
Q: Can I use regular wall paint on my refrigerator?
A: No. Regular wall paint does not stick well to metal and will not handle the cold temperatures or constant wiping. You need specialized appliance or enamel paint.
Q: Do I have to use a primer?
A: Yes, always. The primer is the key layer that makes sure the topcoat sticks firmly to the slick metal surface.
Q: What is the best way to clean the fridge before painting?
A: Clean it thoroughly with a strong degreaser. Rinse it well and let it dry completely before you start sanding or priming.
Q: How long does the paint job need to cure before I can use the fridge again?
A: While it might be dry to the touch in a few hours, you should wait at least 48 to 72 hours before plugging it in or using the doors heavily so the finish can fully harden.
Q: Should I spray paint or brush paint my fridge?
A: Spray painting usually gives the smoothest, most professional-looking finish, especially on flat metal panels. Brushing works for smaller touch-ups, but you must use a high-density foam roller for the main panels.
Q: Will the paint hold up to magnets?
A: Yes, if you used a durable enamel topcoat and a good primer. Magnets should stick normally to the painted surface.
Q: What grit sandpaper should I use?
A: Use a fine-grit sandpaper, like 220-grit. You are not trying to remove all the old paint; you are just creating a dull surface so the new primer can grip.
Q: What if my fridge has dents?
A: You can use auto body filler (putty) to smooth out small dents before sanding. You must prime and paint over the filler just like the rest of the fridge.
Q: Is painting the inside of the fridge safe?
A: It is generally not recommended. The inside of the fridge often has a different plastic or coated metal lining that reacts poorly to standard paint fumes and chemicals.
Q: How do I clean the freshly painted fridge later on?
A: Use only mild soap and water or gentle, non-abrasive kitchen cleaners. Harsh chemicals can break down the new paint finish over time.

Hi, I’m Larry Fish, the mind behind MyGrinderGuide.com.. With a passion for all things kitchen appliances, I created this blog to share my hands-on experience and expert knowledge. Whether it’s helping you choose the right tools for your culinary adventures or offering tips to make your kitchen more efficient, I’m here to guide you. My goal is to make your time in the kitchen not only easier but also enjoyable! Welcome to my world of kitchen mastery!