
Can you sharpen a drill bit with an angle grinder? Yes, you can sharpen a drill bit using an angle grinder, but it requires a steady hand, proper technique, and a good grasp of the required angles. This article provides a comprehensive drill bit sharpening guide, focusing on achieving professional-level results with this power tool.
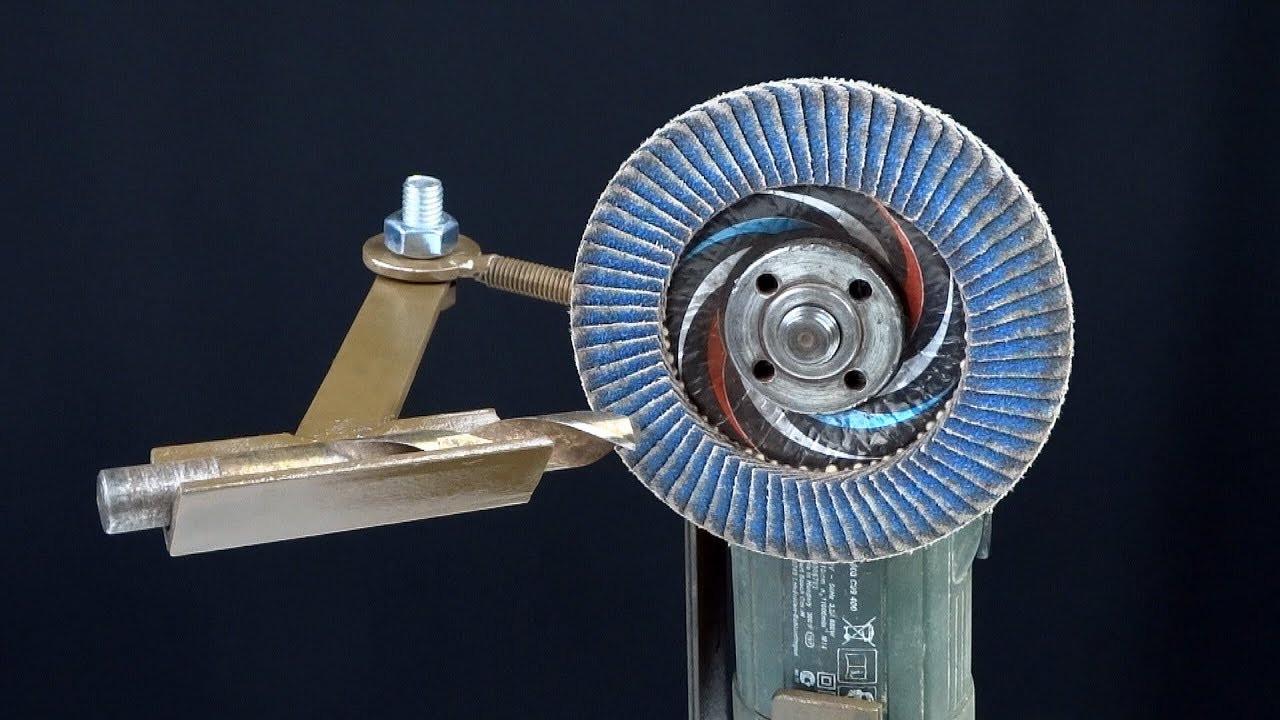
Image Source: binictools.com
Why Sharpen Drill Bits?
Dull drill bits are frustrating. They can:
- Slow down your work
- Create rough, uneven holes
- Overheat and damage the material
- Cause the drill to stall or bind
- Require more force, leading to fatigue or injury
Sharpening your drill bits regularly will save you time, money, and effort. Knowing how to sharpen drill bits with power tools like an angle grinder extends their lifespan and improves your project outcomes.
Is an Angle Grinder the Right Tool?
While specialized drill bit sharpeners are available, an angle grinder offers a readily accessible and versatile alternative for many metalworkers and DIY enthusiasts. However, it’s crucial to acknowledge the risks:
- Aggressiveness: Angle grinders remove material quickly, increasing the risk of over-grinding or altering the drill bit’s geometry.
- Heat: Grinding generates heat, which can damage the temper of the HSS drill bits (High-Speed Steel) if not managed properly.
- Precision: Achieving precise angles and consistent results requires practice and skill.
Despite these challenges, with the right precautions and techniques, an angle grinder can deliver excellent angle grinder drill bit sharpening results.
Essential Safety Precautions
Safety is paramount when sharpening drill bits with grinder. Always wear the following:
- Safety Glasses: Protect your eyes from flying sparks and debris.
- Gloves: Protect your hands from heat and sharp edges.
- Dust Mask: Avoid inhaling grinding dust.
- Hearing Protection: Angle grinders can be noisy.
- Apron: Protect your clothing from sparks and debris.
Before you begin DIY drill bit sharpening follow these safety steps:
- Secure the drill bit: Use pliers or clamps to hold the drill bit securely. Never hold it with your bare hands.
- Inspect the grinding wheel: Ensure the wheel is in good condition, properly mounted, and rated for the material you’re grinding.
- Work in a well-ventilated area: This will help dissipate dust and fumes.
- Keep water nearby: Have a container of water handy to cool the drill bit frequently and prevent overheating.
Tools and Materials You’ll Need
- Angle Grinder: A standard 4.5-inch angle grinder with adjustable speed is ideal.
- Grinding Wheel: Use a fine-grit grinding wheel suitable for sharpening steel. A ceramic or aluminum oxide wheel is recommended.
- Pliers or Clamps: To hold the drill bit securely.
- Water Container: For cooling the drill bit.
- Magnifying Glass (Optional): To inspect the cutting edges closely.
- Angle Finder or Protractor (Optional): To help maintain accurate angles.
- Angle grinder sharpening jig (Optional): Helps maintain angle and consistency, especially for beginners.
Preparing the Drill Bit
Before grinding drill bit angle, clean the drill bit thoroughly with a wire brush to remove any rust, dirt, or debris. This will allow you to inspect the cutting edges more easily and ensure a clean grinding surface.
The Four Main Angles to Consider
Interpreting the geometry of a drill bit is key to effective sharpening. The drill bit has several angles that are crucial for optimal performance:
- Lip Angle (Cutting Angle): The angle between the cutting edge and the chisel edge. This angle affects the drill bit’s aggressiveness and its ability to cut through the material. Typically between 59-60 degrees.
- Clearance Angle (Relief Angle): The angle behind the cutting edge that allows it to cut without rubbing against the material. It is typically between 8-12 degrees. This reduces friction and heat.
- Chisel Edge Angle: The angle of the chisel edge, which is the blunt point at the center of the drill bit. It should be about 135 degrees. This allows the drill bit to center itself and start the hole.
- Point Angle: The overall angle of the drill bit’s tip. This angle varies depending on the material being drilled. For general-purpose drilling, a 118-degree point angle is common. Softer materials may require a steeper angle, while harder materials may require a more shallow angle.
| Angle | Description | Typical Value | Effect |
|---|---|---|---|
| Lip Angle | Angle between the cutting edge and the chisel edge. | 59-60 degrees | Affects cutting aggressiveness and chip formation. |
| Clearance Angle | Angle behind the cutting edge that prevents rubbing. | 8-12 degrees | Reduces friction and heat. |
| Chisel Edge Angle | Angle of the chisel edge at the center of the drill bit. | 135 degrees | Helps center the drill bit and start the hole. |
| Point Angle | Overall angle of the drill bit tip. | 118 degrees | Affects drilling efficiency in different materials; varies with material hardness. |
Step-by-Step Guide to Sharpening
-
Set Up: Secure the grinding wheel on the angle grinder and ensure it’s running smoothly. Have your water container and pliers/clamps ready. If using an angle grinder sharpening jig, set it up according to the manufacturer’s instructions.
-
Initial Grind (Lip Angle): Hold the drill bit at the correct lip angle (59-60 degrees). Gently touch the cutting edge to the grinding wheel. Use light pressure and smooth, consistent movements. Focus on removing only a small amount of material with each pass.
-
Cooling: Dip the drill bit into the water frequently (every few seconds) to prevent overheating. Overheating can cause the steel to lose its temper and become brittle.
-
Clearance Angle Grind: Rotate the drill bit slightly to grind the clearance angle (8-12 degrees) behind the cutting edge. This creates the necessary relief for the cutting edge to function properly. Maintain light pressure and consistent movements.
-
Chisel Edge Correction: If the chisel edge is too wide or uneven, carefully grind it to a point. The chisel edge angle should be approximately 135 degrees. Again, use light pressure and frequent cooling.
-
Repeat for the Second Cutting Edge: Repeat steps 2-5 for the second cutting edge, ensuring that both cutting edges are symmetrical and of equal length. This is crucial for balanced drilling.
-
Inspection: Use a magnifying glass to inspect the cutting edges. Look for any imperfections, such as unevenness, burrs, or chips. If necessary, make additional light passes on the grinding wheel to correct these imperfections.
-
Deburring: Use a fine file or honing stone to remove any burrs from the cutting edges. This will ensure a clean and smooth cut.
Advanced Techniques and Tips
- Using a Jig: An angle grinder sharpening jig can significantly improve the accuracy and consistency of your sharpening. These jigs provide a stable platform and adjustable angles, making it easier to achieve professional results.
- Visual Aids: Use visual aids, such as printed templates or online tutorials, to help you visualize the correct angles and techniques.
- Practice: Sharpening drill bits with an angle grinder requires practice. Start with dull or damaged drill bits to hone your skills before working on your good ones.
- Listen to the Sound: The sound of the grinding wheel can provide valuable feedback. A smooth, consistent sound indicates proper contact and material removal. A harsh or erratic sound may indicate excessive pressure or incorrect angles.
- Check for Symmetry: Regularly check the symmetry of the cutting edges. Uneven cutting edges will cause the drill bit to wobble and create uneven holes.
- Don’t Overheat: Overheating is the most common mistake when sharpening drill bits. Frequent cooling is essential to prevent damage to the steel.
- Less is More: It’s better to remove too little material than too much. You can always make additional passes on the grinding wheel, but you can’t put material back.
Sharpening HSS Drill Bits vs. Other Materials
Metalworking drill sharpening varies depending on the material of the drill bit. HSS (High-Speed Steel) drill bits are the most common type and can be sharpened using the techniques described above. However, other materials, such as carbide-tipped drill bits, require specialized grinding wheels and techniques. Carbide is much harder than HSS and requires a diamond grinding wheel.
| Drill Bit Material | Grinding Wheel Type | Notes |
|---|---|---|
| HSS | Aluminum Oxide or Ceramic | Frequent cooling is essential. |
| Carbide | Diamond Grinding Wheel | Requires specialized equipment and techniques. |
| Cobalt | Aluminum Oxide or Ceramic | Similar to HSS but may require slightly less frequent cooling. |
Troubleshooting
- Drill bit not cutting: Check the lip angle and clearance angle. The lip angle may be too shallow, or the clearance angle may be insufficient.
- Drill bit wandering: Check the symmetry of the cutting edges. Uneven cutting edges will cause the drill bit to wander.
- Drill bit overheating: Cool the drill bit more frequently. You may be applying too much pressure or grinding for too long.
- Drill bit breaking: The steel may have lost its temper due to overheating. Discard the drill bit and start with a new one.
Alternative Sharpening Methods
While this guide focuses on using an angle grinder, other drill bit sharpening techniques exist:
- Drill Bit Sharpening Machines: These machines are specifically designed for sharpening drill bits and offer a high degree of accuracy and consistency.
- Bench Grinder: A bench grinder provides a more stable platform than an angle grinder, making it easier to control the grinding process.
- Hand Sharpening: Using a file or honing stone can be effective for minor touch-ups and maintaining the sharpness of drill bits.
Maintaining Sharpened Drill Bits
Once you’ve finished sharpening your drill bits, make sure to keep them in a protective case or a storage rack. This stops them from banging into each other, which can dull the edges or cause damage. It’s also a good idea to check the tips every now and then—if they start looking a little worn, a quick touch-up will keep them sharp and ready for your next project.
Conclusion
Sharpening drill bits with an angle grinder is a valuable skill that can save you time and money. By following the steps outlined in this drill bit sharpening guide, practicing diligently, and prioritizing safety, you can achieve professional-level results and extend the life of your drill bits. Remember to take your time, focus on accuracy, and always prioritize safety.
Frequently Asked Questions (FAQ)
Q: What is the best grinding wheel for sharpening drill bits?
A: A fine-grit aluminum oxide or ceramic grinding wheel is generally recommended for sharpening HSS drill bits.
Q: Can I use an angle grinder to sharpen carbide drill bits?
A: No, carbide drill bits require a diamond grinding wheel specifically designed for sharpening carbide.
Q: How often should I sharpen my drill bits?
A: Sharpen your drill bits whenever they become dull or show signs of wear, such as difficulty cutting or producing rough holes.
Q: What is the correct lip angle for a drill bit?
A: The lip angle is typically between 59 and 60 degrees for general-purpose drilling.
Q: How do I prevent overheating when sharpening drill bits?
A: Cool the drill bit frequently by dipping it in water every few seconds. Use light pressure and avoid grinding for extended periods.

Hi, I’m Larry Fish, the mind behind MyGrinderGuide.com.. With a passion for all things kitchen appliances, I created this blog to share my hands-on experience and expert knowledge. Whether it’s helping you choose the right tools for your culinary adventures or offering tips to make your kitchen more efficient, I’m here to guide you. My goal is to make your time in the kitchen not only easier but also enjoyable! Welcome to my world of kitchen mastery!