
How long should you knead bread dough in a KitchenAid mixer? The ideal KitchenAid bread dough kneading time is typically between 6 to 8 minutes on speed 2. However, this isn’t a hard and fast rule, and the exact optimal kneading duration KitchenAid depends on factors like the recipe, hydration level of the dough, and the specific mixer model. This article explores everything you need to know about kneading bread dough in your KitchenAid mixer, from identifying the signs of properly kneaded dough KitchenAid to preventing the dreaded over kneading bread dough KitchenAid.
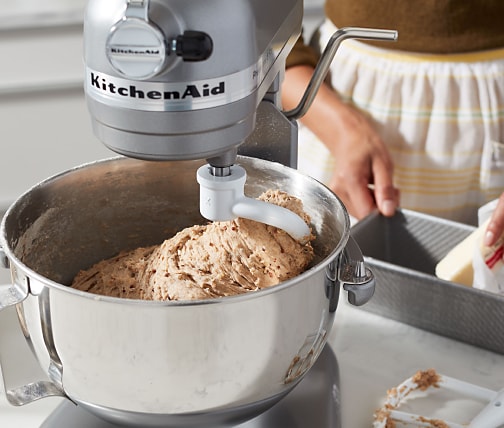
Image Source: www.kitchenaid.com
Mastering Bread Dough Kneading with Your KitchenAid Mixer
Kneading is a crucial step in bread making. It develops the gluten in the flour, creating a strong, elastic network that traps gas produced by the yeast, allowing the bread to rise properly and giving it a chewy texture. While you can knead by hand, a KitchenAid mixer makes the process much easier and faster. This bread dough mixer kneading guide will help you achieve perfect results every time.
Why Use a KitchenAid Mixer for Kneading?
KitchenAid mixers are strong and reliable, which makes them perfect for kneading bread dough. They save you a ton of time and energy compared to doing it all by hand. Plus, the mixer does such a steady job that your dough comes out perfectly smooth every time, which means your bread will turn out even better.
Benefits of Mixer Kneading
- Consistency: A mixer provides consistent power and speed, ensuring uniform gluten development.
- Efficiency: It’s much faster than hand kneading, freeing up your time for other tasks.
- Less Effort: Kneading can be physically demanding. A mixer takes the strain off your arms and shoulders.
- Improved Texture: Even kneading contributes to a more even crumb structure in the finished bread.
The Right Tools for the Job
Using the correct attachment is vital for successful kneading. KitchenAid mixers typically come with three standard attachments: a flat beater, a wire whisk, and a dough hook. For bread dough, the KitchenAid dough hook kneading time recommendation assumes you’re using the dough hook!
The Dough Hook: Your Kneading Companion
The dough hook is designed specifically for kneading bread dough. Its spiral or “C” shape helps to push and pull the dough, developing the gluten effectively. Make sure you’re using the dough hook and not the flat beater or wire whisk.
Achieving Optimal KitchenAid Mixer Gluten Development: A Step-by-Step Guide
Here’s a detailed guide to kneading bread dough in your KitchenAid mixer:
- Assemble Your Ingredients: Measure out all your ingredients accurately, following your chosen bread recipe.
- Combine Ingredients: In the KitchenAid mixer bowl, combine the flour, water, yeast, salt, and any other ingredients specified in your recipe.
- Initial Mixing: Use the flat beater on speed 1 (or the lowest speed) to bring the ingredients together until a shaggy dough forms. This usually takes about 1-2 minutes.
- Switch to the Dough Hook: Replace the flat beater with the dough hook attachment.
- Start Kneading: Begin kneading on speed 2. This is the recommended mixer kneading speed for bread dough.
- Monitor the Dough: Keep a close eye on the dough as it kneads. It should start to pull away from the sides of the bowl and form a cohesive ball.
- Adjust Hydration (If Needed): If the dough seems too dry (crumbly and not coming together), add a teaspoon of water at a time until it reaches the right consistency. If it seems too wet (sticky and clinging to the sides of the bowl), add a tablespoon of flour at a time.
- Kneading Time: Knead for 6 to 8 minutes. As mentioned earlier, this is a general guideline. Some recipes or doughs may require slightly more or less time.
- Check for Doneness: After 6 minutes, stop the mixer and check the dough for the signs of properly kneaded dough KitchenAid.
Spotting Properly Kneaded Dough: The Windowpane Test
The windowpane test is the best way to determine if your dough has been kneaded sufficiently.
The Windowpane Test Explained
- Take a small piece of dough (about the size of a golf ball).
- Gently stretch it between your fingers, rotating it as you stretch.
- If the dough stretches into a thin, translucent membrane without tearing, it has passed the windowpane test and is properly kneaded. You should be able to see light through it, similar to a windowpane.
- If the dough tears easily, it needs more kneading. Continue kneading for another minute or two and then test again.
Avoiding Over Kneading Bread Dough KitchenAid: A Common Pitfall
While under-kneading is a problem, so is over-kneading. Over-kneading can damage the gluten structure, resulting in a tough, dense bread.
How to Recognize Over-Kneaded Dough
- The dough will feel tight and stiff.
- It may be difficult to stretch or shape.
- It may start to tear easily.
- The finished bread may be dense and tough.
What to Do If You Over-Knead
Unfortunately, there’s no way to completely reverse the effects of over-kneading. However, you can try letting the dough rest for a longer period. This can sometimes help to relax the gluten and improve the texture slightly.
Factors Influencing Kneading Time
Several factors can affect how long you need to knead bread dough in your KitchenAid mixer.
Flour Type
Different types of flour have different protein content, which affects gluten development. Bread flour, with its higher protein content, typically requires longer kneading than all-purpose flour.
Hydration Level
The hydration level (the ratio of water to flour) also plays a role. High-hydration doughs (those with a higher water content) may require slightly longer kneading times.
Mixer Model
Different KitchenAid mixer models have varying power and performance. Older or less powerful models may require longer kneading times than newer, more powerful models.
Recipe Requirements
Some recipes may specifically call for a shorter or longer kneading time based on the desired texture of the final product. Always follow the instructions in your chosen recipe.
Troubleshooting Common Kneading Problems
Here are some solutions to common problems encountered while kneading bread dough in a KitchenAid mixer:
| Problem | Possible Cause(s) | Solution(s) |
|---|---|---|
| Dough is not coming together | Not enough liquid; Inaccurate ingredient measurements; Old flour | Add liquid 1 teaspoon at a time; Remeasure ingredients; Use fresh flour |
| Dough is too sticky | Too much liquid; High humidity; Over-kneading | Add flour 1 tablespoon at a time; Adjust for humidity; Avoid over-kneading |
| Dough is climbing up the dough hook | Dough is too wet; Mixer speed is too high | Reduce hydration; Lower mixer speed to 2 |
| Dough is tearing during kneading | Not enough gluten development; Over-kneading | Continue kneading for a few more minutes; Check for signs of over-kneading |
| Dough is tough and dense | Over-kneading; Not enough rise time; Too much flour | Avoid over-kneading; Ensure adequate rise time; Measure flour accurately |
KitchenAid Mixer Bread Recipe Kneading: An Example
Let’s look at a simple bread recipe and the associated kneading instructions:
Basic White Bread Recipe
- 3 cups (360g) bread flour
- 1 1/4 cups (300ml) warm water (105-115°F)
- 1 1/2 teaspoons (5g) active dry yeast
- 1 1/2 teaspoons (9g) salt
- 2 tablespoons (30ml) olive oil
Instructions (with KitchenAid Kneading):
- In the KitchenAid mixer bowl, combine warm water and yeast. Let stand for 5 minutes until foamy.
- Add flour, salt, and olive oil to the bowl.
- Using the flat beater, mix on speed 1 until a shaggy dough forms (1-2 minutes).
- Switch to the dough hook.
- Knead on speed 2 for 6-8 minutes, or until the dough is smooth, elastic, and passes the windowpane test.
- Place dough in a greased bowl, cover, and let rise in a warm place for 1-1.5 hours, or until doubled in size.
- Punch down the dough and shape it into a loaf.
- Place in a greased loaf pan, cover, and let rise for another 30-45 minutes.
- Bake at 375°F (190°C) for 30-35 minutes, or until golden brown.
Beyond the Basics: Tips for Perfect Kneading
- Use a Kitchen Scale: For consistent results, weigh your ingredients instead of measuring them by volume.
- Check the Dough Temperature: The ideal dough temperature after kneading is between 75-80°F (24-27°C).
- Don’t Overload the Mixer: If you’re making a large batch of dough, knead it in two separate batches to avoid straining your mixer.
- Clean the Dough Hook: After kneading, clean the dough hook immediately to prevent dough from hardening on it.
- Experiment: Don’t be afraid to experiment with different kneading times to find what works best for your recipes and your mixer.
Maintenance and Care
Proper maintenance of your KitchenAid mixer ensures it continues to perform optimally for years to come.
Regular Cleaning
Clean the bowl and attachments after each use. The dough hook is usually dishwasher safe, but check your mixer’s manual. Wipe down the mixer body with a damp cloth.
Professional Servicing
If you notice any unusual noises or performance issues, consider having your mixer professionally serviced.
Frequently Asked Questions (FAQ)
Q: Can I knead dough on speed 4 or 6 in my KitchenAid mixer?
A: It’s generally not recommended to knead dough at higher speeds in a KitchenAid mixer. Speed 2 is the ideal mixer kneading speed for bread dough as it provides the right balance of power and control without overheating the motor. Higher speeds can strain the motor and potentially damage the mixer.
Q: How to tell when dough is kneaded enough mixer?
A: The best way how to tell when dough is kneaded enough mixer is by using the windowpane test. If the dough stretches into a thin, translucent membrane without tearing, it’s properly kneaded. The dough should also be smooth and elastic.
Q: What happens if I don’t knead bread dough enough?
A: If you don’t knead bread dough enough, the gluten will not develop properly. This can result in a bread that is dense, crumbly, and doesn’t rise well.
Q: Can I use my KitchenAid mixer to knead sourdough bread?
A: Yes, you can use your KitchenAid mixer to knead sourdough bread. The kneading time may vary depending on the hydration level of the dough. Generally, sourdough doughs benefit from a slightly longer kneading time.
Q: Is it possible to overwork the motor of my KitchenAid while kneading?
A: Yes, it’s possible to overwork the motor, especially if you’re kneading a large batch of heavy dough at a high speed. Stick to speed 2 and avoid kneading for extended periods without breaks. If your mixer starts to sound strained or hot, stop kneading and let it cool down before continuing.
By following this comprehensive guide, you’ll be well-equipped to knead bread dough perfectly in your KitchenAid mixer, achieving consistently delicious results. Happy baking!

Hi, I’m Larry Fish, the mind behind MyGrinderGuide.com.. With a passion for all things kitchen appliances, I created this blog to share my hands-on experience and expert knowledge. Whether it’s helping you choose the right tools for your culinary adventures or offering tips to make your kitchen more efficient, I’m here to guide you. My goal is to make your time in the kitchen not only easier but also enjoyable! Welcome to my world of kitchen mastery!