
Do you need to change a grinder wheel? Yes, you’ll need to replace your grinder wheel when it’s worn down, damaged, or when you want to switch to a different type of wheel for a specific task. This guide provides comprehensive grinder wheel change instructions, including safety tips and best practices for angle grinder wheel change and bench grinder wheel installation. Whether you’re replacing grinding disc, changing cutting wheel grinder, replacing abrasive wheel grinder, or simply removing grinder wheel safely, this article will walk you through the process.
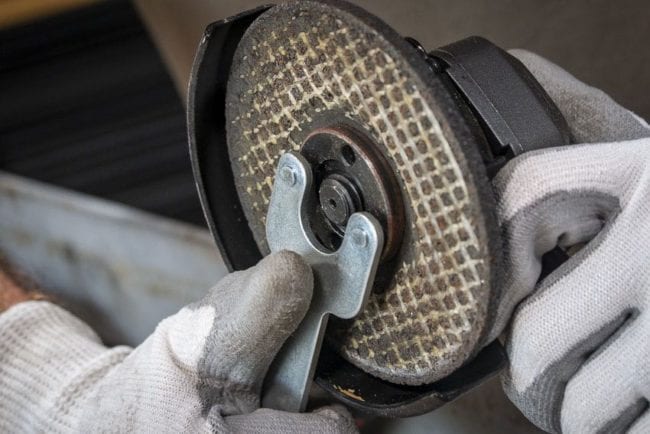
Image Source: www.protoolreviews.com
Safety First: Protecting Yourself
Before you even think about taking off or putting on a grinder wheel, remember that safety is the most important thing. Grinders are very powerful machines, and even a small mistake can cause a serious injury.
Essential Safety Gear
Always wear the following:
- Safety Glasses or a Face Shield: Protect your eyes from flying debris.
- Gloves: Provide a better grip and protect your hands.
- Hearing Protection: Grinders are loud. Protect your ears.
- Dust Mask or Respirator: Grinding creates dust that can be harmful to breathe.
- Closed-Toe Shoes: Protect your feet.
Machine Inspection and Preparation
- Unplug the Grinder: This is the most critical step! Never work on a plugged-in grinder.
- Inspect the Grinder: Look for any signs of damage, such as cracked housings or frayed cords. If you find any, do not use the grinder until it is repaired.
- Check the Grinder Wheel: Examine the wheel for cracks, chips, or excessive wear. A damaged wheel can shatter during use.
- Read the Manual: Familiarize yourself with the specific instructions for your grinder model. Each grinder may have slightly different mechanisms.
- Secure the Workpiece: If working with a bench grinder, ensure your workpiece is securely clamped or held in place.
Wheel Safety: A Critical Focus
- Match RPM Ratings: Never use a wheel with a lower maximum RPM rating than the grinder’s RPM. Using the wrong speed wheel can cause it to explode.
- Inspect Wheels Before Use: Always check for damage before mounting a new wheel. Even a small crack can lead to failure.
- Store Wheels Properly: Keep grinding wheels in a dry, safe place to prevent damage.
- Use the Correct Wheel Type: Choose the right wheel for the material you are grinding. Using the wrong wheel can be dangerous and ineffective.
Grinder Wheel Removal: Step-by-Step Guide
The process for removing a grinder wheel varies slightly depending on the type of grinder. We’ll cover both angle grinders and bench grinders.
Removing a Wheel from an Angle Grinder
This section focuses on angle grinder wheel change procedures.
- Unplug the Angle Grinder: Again, this is crucial.
- Locate the Spindle Lock: This is a button that, when pressed, locks the spindle to prevent it from rotating.
- Engage the Spindle Lock: Press and hold the spindle lock button. You may need to rotate the wheel slightly until the lock engages fully.
- Loosen the Lock Nut: Use the wrench provided with your angle grinder to loosen the lock nut. Angle grinders typically have a specialized wrench with two pins that fit into the lock nut. Note: In most cases, the lock nut is reverse threaded. Turn the wrench counter-clockwise to loosen.
- Remove the Lock Nut and Outer Flange: Once the nut is loose, unscrew it completely and remove it, along with the outer flange.
- Remove the Old Grinder Wheel: Carefully slide the old grinder wheel off the spindle.
- Inspect the Inner Flange: Check the inner flange for any damage. If damaged, replace it.
Removing a Wheel from a Bench Grinder
This section covers bench grinder wheel installation processes and prepping for it by removing the old wheel.
- Unplug the Bench Grinder: Safety First.
- Remove the Wheel Guard: Most bench grinders have a wheel guard that needs to be removed to access the wheel. Typically, this is held in place by screws. Remove the screws and carefully detach the guard.
- Locate the Arbor Nut: The arbor nut holds the grinding wheel in place.
- Secure the Spindle: Some bench grinders have a built-in spindle lock. If yours does, engage it. If not, you may need to use a wrench to hold the spindle stationary. Carefully wedge a wrench on the opposite side of the wheel to prevent movement. Be sure to not damage the housing.
- Loosen the Arbor Nut: Use a wrench to loosen the arbor nut. Unlike angle grinders, bench grinder arbor nuts are usually standard right-hand thread. Turn the wrench counter-clockwise to loosen.
- Remove the Arbor Nut and Outer Flange: Unscrew the nut completely and remove it, along with the outer flange.
- Remove the Old Grinding Wheel: Carefully slide the old grinding wheel off the arbor.
- Inspect the Inner Flange: Check the inner flange for damage. Replace if necessary.
Grinder Wheel Installation: A Comprehensive Guide
Now that you’ve removed the old wheel, let’s install the new one. This guide will cover how to install grinding wheel for both angle and bench grinders.
Installing a Wheel on an Angle Grinder
- Inspect the New Wheel: Before installing the new wheel, inspect it for any damage. Do not use a damaged wheel.
- Mount the Inner Flange: Ensure the inner flange is properly seated on the spindle.
- Mount the New Grinder Wheel: Carefully slide the new grinder wheel onto the spindle, ensuring it sits flush against the inner flange.
- Install the Outer Flange and Lock Nut: Place the outer flange against the wheel and then screw on the lock nut.
- Tighten the Lock Nut: Use the wrench to tighten the lock nut securely. Remember, angle grinders often have reverse-threaded nuts.
- Release the Spindle Lock: Release the spindle lock button.
- Test the Wheel: Plug in the grinder and briefly run it to ensure the wheel is running smoothly and there are no unusual vibrations. Unplug the grinder.
Installing a Wheel on a Bench Grinder
- Inspect the New Wheel: As with angle grinders, check the new wheel for damage.
- Mount the Inner Flange: Ensure the inner flange is properly seated on the arbor.
- Mount the New Grinding Wheel: Carefully slide the new grinding wheel onto the arbor, ensuring it sits flush against the inner flange.
- Install the Outer Flange and Arbor Nut: Place the outer flange against the wheel and then screw on the arbor nut.
- Tighten the Arbor Nut: Use a wrench to tighten the arbor nut securely.
- Replace the Wheel Guard: Reattach the wheel guard and secure it with the screws.
- Test the Wheel: Plug in the grinder and briefly run it to ensure the wheel is running smoothly and there are no unusual vibrations.
Choosing the Right Grinder Wheel: A Detailed Look
Selecting the correct grinder wheel is crucial for safety and efficiency. Different wheels are designed for different materials and applications.
Types of Grinding Wheels
| Wheel Type | Material | Application |
|---|---|---|
| Aluminum Oxide | Steel, Ferrous Metals | General-purpose grinding, Deburring |
| Silicon Carbide | Non-ferrous Metals, Stone, Glass | Grinding softer materials, Sharpening tools |
| Ceramic | High-Speed Steel, Hard Alloys | Precision grinding, High stock removal rates |
| Diamond | Concrete, Stone, Masonry | Cutting and grinding hard, abrasive materials |
| Flap Discs | Steel, Stainless Steel, Aluminum | Grinding, Blending, Finishing |
| Cut-off Wheels | Metal, Masonry | Cutting materials to size |
| Wire Wheels | Various Metals | Removing rust, Paint, and Scale. |
Factors to Consider
- Material: Choose a wheel designed for the material you’ll be grinding. Using the wrong wheel can damage the workpiece and be dangerous.
- Grit Size: Grit size determines the fineness of the grind. Coarse grits remove material quickly, while fine grits produce a smoother finish.
- Wheel Diameter and Thickness: Match the wheel size to your grinder’s specifications. Do not use wheels that are too large or too thick.
- Arbor Size: The arbor size must match the grinder’s spindle size.
- Maximum RPM: Never exceed the wheel’s maximum RPM rating.
Maintenance and Care
Proper maintenance extends the life of your grinder and grinding wheels.
Cleaning Your Grinder
- Regular Cleaning: Keep your grinder clean by wiping it down with a cloth after each use.
- Remove Debris: Use a brush or vacuum to remove accumulated dust and debris from the grinder housing.
- Check Ventilation: Ensure the grinder’s ventilation slots are clear to prevent overheating.
Storing Grinding Wheels
- Dry Environment: Store grinding wheels in a dry place to prevent moisture absorption, which can weaken the wheel.
- Safe Location: Store wheels in a safe location where they won’t be damaged or dropped.
- Original Packaging: If possible, store wheels in their original packaging to protect them from damage.
Dressing Grinding Wheels
- Why Dress a Wheel? Over time, grinding wheels can become clogged with material, reducing their effectiveness. Dressing the wheel removes this buildup and restores its cutting ability.
- Using a Wheel Dresser: A wheel dresser is a tool used to remove the outer layer of the grinding wheel. Follow the manufacturer’s instructions for your specific wheel dresser.
- Safety Precautions: Wear safety glasses and a dust mask when dressing a grinding wheel.
Troubleshooting Common Issues
Even with proper technique, you might encounter problems. Here’s how to address some common issues when replacing abrasive wheel grinder.
- Wheel Vibrates Excessively:
- Cause: The wheel may be damaged, improperly mounted, or out of balance.
- Solution: Inspect the wheel for damage. Remount the wheel carefully, ensuring it is properly seated on the flanges. Consider balancing the wheel.
- Wheel Overheats:
- Cause: Excessive pressure, using the wrong wheel for the material, or a clogged wheel.
- Solution: Reduce pressure. Choose a wheel designed for the material. Dress the wheel to remove buildup.
- Difficult to Remove Lock Nut:
- Cause: Lock nut is too tight or corroded.
- Solution: Use penetrating oil to loosen the nut. Use a longer wrench for more leverage. Ensure you are turning the nut in the correct direction (angle grinders typically have reverse-threaded nuts).
- Grinder Stalls:
- Cause: Excessive pressure, using the wrong wheel for the material, or a weak motor.
- Solution: Reduce pressure. Choose a wheel designed for the material. Ensure the grinder is properly powered.
Fathoming Grinder Wheel Markings
Grinder wheels have markings that tell you important information about their composition and usage. Deciphering these markings is crucial for selecting the right wheel and ensuring safe operation. Here’s a breakdown of common markings:
- Abrasive Type: This indicates the material used to make the abrasive grains, such as Aluminum Oxide (A), Silicon Carbide (C), or Ceramic (SG).
- Grit Size: This number indicates the size of the abrasive grains. Lower numbers indicate coarser grits (for rapid material removal), while higher numbers indicate finer grits (for smoother finishes).
- Grade (Hardness): This letter indicates the bond strength or hardness of the wheel. Wheels range from “A” (soft) to “Z” (hard). Softer wheels wear faster but are less prone to loading, while harder wheels last longer but can generate more heat if used improperly.
- Structure: This number (often optional) indicates the spacing between the abrasive grains. Denser structures are suitable for harder materials, while more open structures are better for softer materials.
- Bond Type: This indicates the material used to bind the abrasive grains together. Common bond types include Vitrified (V), Resinoid (B), and Rubber (R).
- Manufacturer’s Symbol: This is a unique symbol or code that identifies the manufacturer of the wheel.
- Maximum Operating Speed (RPM): This is the most important marking! It indicates the maximum speed at which the wheel can safely operate. Never exceed this speed.
- Safety Markings: Look for safety markings such as ANSI (American National Standards Institute) or EN (European Norm) compliance.
Example of a Grinder Wheel Marking: A36P5V
- A: Aluminum Oxide abrasive
- 36: Grit size
- P: Grade (hardness)
- 5: Structure
- V: Vitrified bond
FAQ: Frequently Asked Questions
Q: How often should I replace my grinder wheel?
A: Replace your grinder wheel when it is worn down to a point where it is no longer effective, if it is damaged (cracked, chipped), or if you need a different type of wheel for a specific task. Regularly inspect your wheel before each use.
Q: Can I use a cutting wheel on a grinding wheel?
A: No, cutting wheels and grinding wheels are designed for different purposes and have different safety requirements. Using a cutting wheel as a grinding wheel, or vice versa, can be extremely dangerous.
Q: What is the difference between a Type 1 and a Type 27 grinding wheel?
A: A Type 1 grinding wheel is a straight or flat wheel, while a Type 27 grinding wheel has a depressed center and is often used for grinding at an angle. Use the correct type of wheel for your application.
Q: How do I prevent my grinding wheel from clogging?
A: Choose a wheel that is appropriate for the material you are grinding. Use a wheel dressing tool to clean the wheel regularly. Reduce pressure if the wheel is overheating.
Q: What should I do with old grinding wheels?
A: Dispose of used grinding wheels properly. Check with your local waste disposal regulations. Some manufacturers may also offer recycling programs.
Q: Is it safe to grind aluminum?
A: Yes, but use a grinding wheel specifically designed for aluminum. Aluminum can clog regular grinding wheels, which can be dangerous. Silicon carbide wheels are often recommended for aluminum.
By following these safety tips and best practices, you can safely and effectively change your grinder wheel and keep your grinder in good working order. Always prioritize safety and choose the right wheel for the job.

Hi, I’m Larry Fish, the mind behind MyGrinderGuide.com.. With a passion for all things kitchen appliances, I created this blog to share my hands-on experience and expert knowledge. Whether it’s helping you choose the right tools for your culinary adventures or offering tips to make your kitchen more efficient, I’m here to guide you. My goal is to make your time in the kitchen not only easier but also enjoyable! Welcome to my world of kitchen mastery!