
What is mold sling in a kitchen sink, and how do you get rid of it? Mold sling, often appearing as a slimy, discolored buildup (typically black, green, or pink), is a common problem in kitchen sinks, particularly in the drain. It’s caused by a combination of moisture, food debris, and bacteria. Removing it requires cleaning solutions and preventative measures. This article provides step-by-step guidance on kitchen sink mold removal.
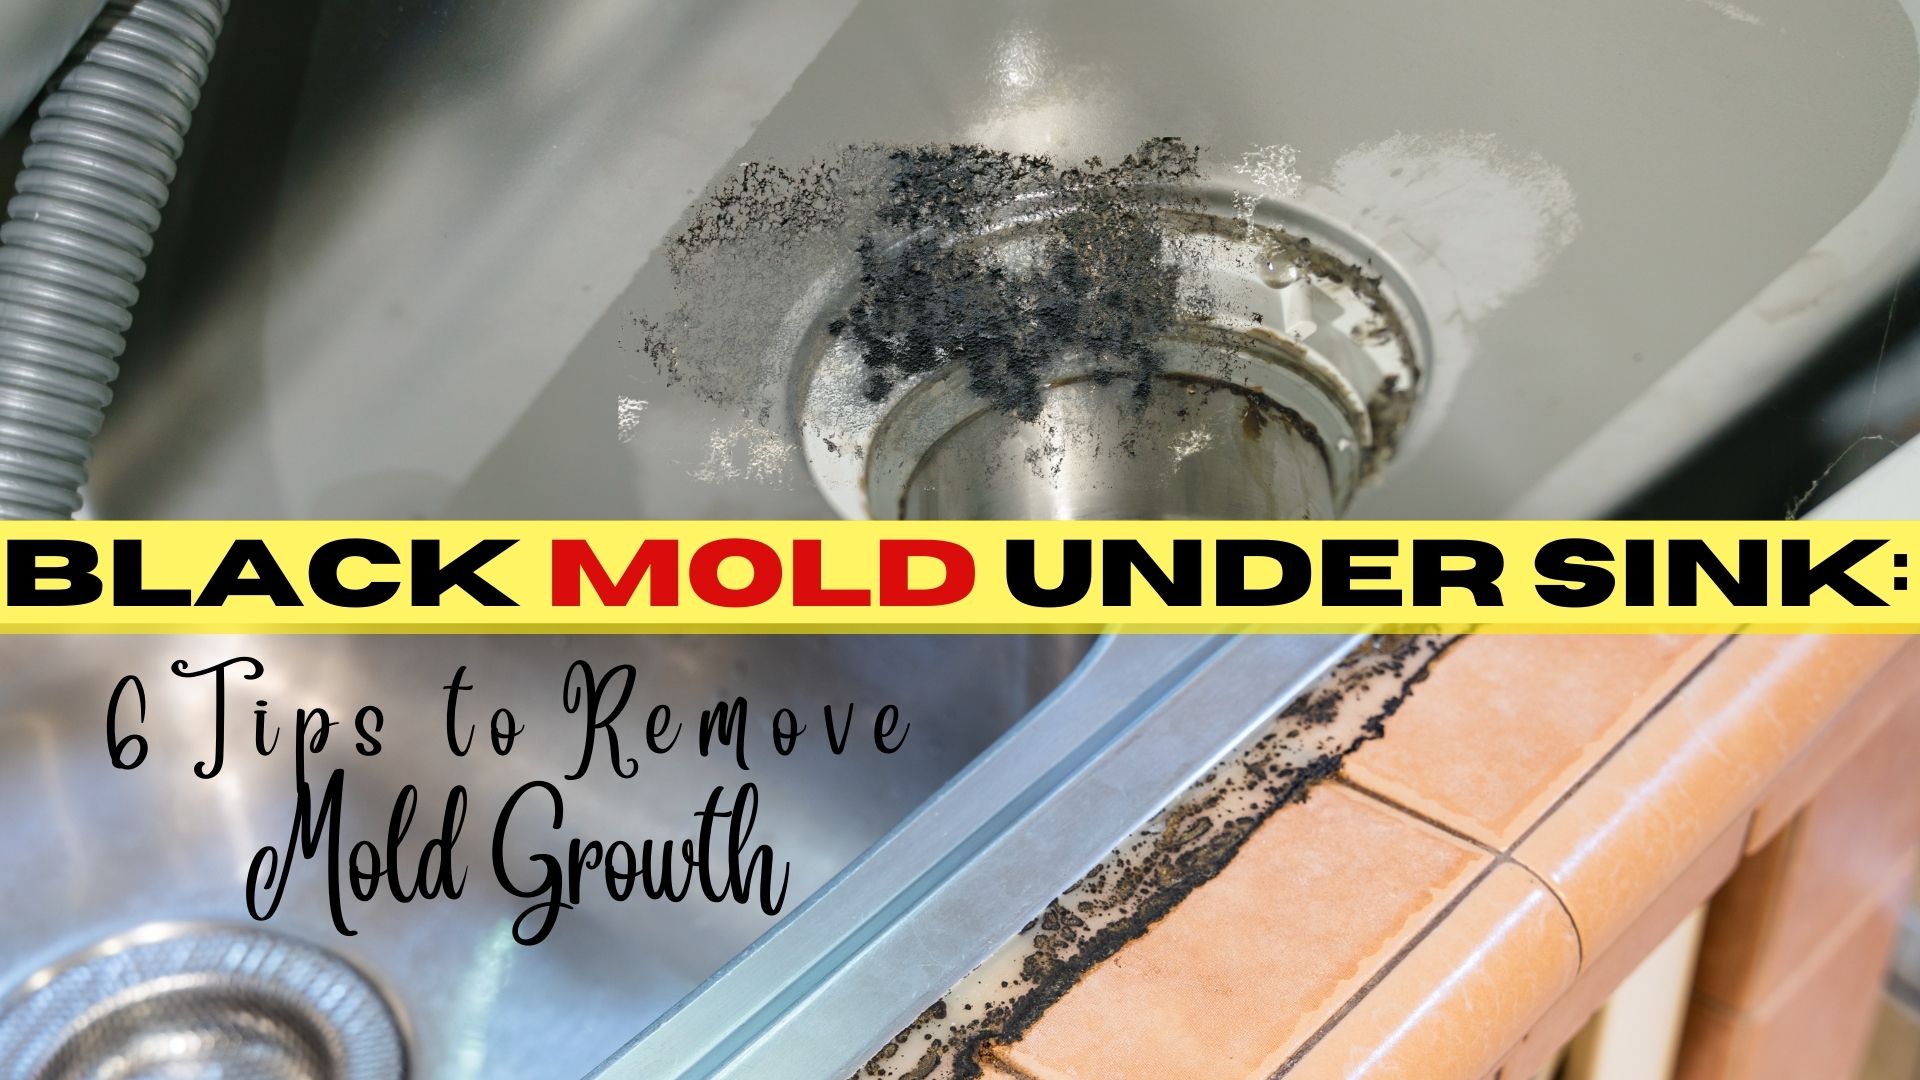
Image Source: superiorrestore.com
Why Mold Grows in Your Kitchen Sink
Mold thrives in damp, dark environments with a ready food source – conditions often found in kitchen sinks. Leftover food particles, grease, and constant moisture create a perfect breeding ground for mold and bacteria. Let’s look at the specific factors that contribute to kitchen sink mold:
- Food Debris: Even with careful rinsing, tiny food particles inevitably end up in the drain. These particles provide nourishment for mold growth.
- Moisture: The sink is consistently exposed to water, and the drain area is perpetually damp, creating an ideal environment for mold to flourish.
- Poor Ventilation: Under-sink cabinets often lack adequate ventilation, trapping moisture and further promoting mold growth.
- Grease Buildup: Grease coats the drainpipes, trapping food particles and providing a sticky surface for mold to adhere to.
- Infrequent Cleaning: Regular cleaning is essential to prevent mold growth. When neglected, mold can quickly establish itself.
Types of Mold Commonly Found
Several types of mold can take root in your kitchen sink. While identifying the specific species requires professional testing, recognizing common types can help you understand the potential health risks and cleaning approaches. Here are some of the more common culprits:
- Black Mold (Stachybotrys chartarum): Known for its dark color and potential to produce mycotoxins, black mold is a concern. Though less frequent in sinks than other molds, its presence warrants careful remediation. Dealing with black mold in kitchen sink drain needs immediate attention.
- Pink Mold (Serratia marcescens): While technically a bacterium, pink mold often appears alongside other molds in damp environments like sinks. It appears as a pink or orange slimy residue.
- Green Mold (Cladosporium, Aspergillus, Penicillium): These molds are very common and can appear in various shades of green. They thrive on organic matter and moisture.
- White Mold: Various molds can appear white, especially in their early stages. It can be difficult to differentiate from mineral buildup without close inspection.
Recognizing the Signs of Mold in Your Kitchen Sink
Early detection is crucial for easy kitchen sink mold removal. Being aware of the telltale signs can help you take action before the problem escalates.
- Visible Mold Growth: The most obvious sign is the presence of visible mold. Look for discoloration, slimy patches, or fuzzy growth around the sink drain, faucet base, and under-sink area.
- Musty Odor: A persistent, musty smell emanating from the sink or under-sink cabinet is a strong indicator of mold, even if you can’t see it.
- Slime Buildup: Slimy, discolored residue in the sink drain is a common sign of mold and bacterial growth. This slime, often referred to as a mold sling, provides a breeding ground for further mold development.
- Allergic Reactions: Unexplained allergy symptoms, such as sneezing, coughing, runny nose, or skin irritation, can be triggered by mold spores in the air.
- Water Stains: Water stains around the sink or under-sink cabinet can indicate leaks, which create damp conditions that promote mold growth.
Step-by-Step Guide: Kitchen Sink Mold Removal
This guide provides detailed instructions on how to effectively remove mold from your kitchen sink. Remember to wear gloves and eye protection during the cleaning process.
Step 1: Gather Your Supplies
Before you begin, gather the necessary cleaning supplies:
- Rubber Gloves: Protect your skin from mold and cleaning solutions.
- Eye Protection: Safety glasses or goggles will prevent splashes from irritating your eyes.
- Cleaning Brush: A stiff-bristled brush or toothbrush is ideal for scrubbing mold.
- Sponge or Cloth: For wiping surfaces.
- Baking Soda: A natural and effective cleaning agent.
- White Vinegar: An excellent disinfectant and mold killer.
- Hydrogen Peroxide: A powerful disinfectant and bleaching agent.
- Bleach (Optional): For stubborn mold, but use with caution and proper ventilation.
- Drain Cleaner (Enzyme-Based): Helps break down organic matter in the drain.
- Screwdriver (if needed): To remove drain components for cleaning.
Step 2: Initial Cleaning of Sink Surface
Begin by cleaning the visible surfaces of the sink to remove loose debris and grime.
- Rinse the sink: Thoroughly rinse the sink with warm water.
- Apply Baking Soda: Sprinkle baking soda generously over the sink surface, focusing on areas with visible stains or grime.
- Scrub: Use a damp sponge or cloth to scrub the baking soda into the surface.
- Rinse Again: Rinse the sink thoroughly with warm water to remove the baking soda residue.
Step 3: Addressing Mold in the Drain
The sink drain is a prime location for mold growth, so it requires targeted cleaning.
- Prepare a Vinegar Solution: Mix equal parts white vinegar and warm water in a spray bottle.
- Spray the Drain: Spray the vinegar solution liberally into the drain opening.
- Let it Sit: Allow the vinegar solution to sit for at least 30 minutes to break down mold and grime. Overnight is even better for severe build-up.
- Flush with Hot Water: After soaking, flush the drain with hot water for several minutes to dislodge any loosened debris.
- Baking Soda and Vinegar Volcano: Pour 1 cup of baking soda down the drain, followed by 1 cup of white vinegar. The mixture will fizz and bubble.
- Let it Fizz: Allow the mixture to fizz for 30 minutes. This chemical reaction helps to dislodge and eliminate mold.
- Flush with Boiling Water: Carefully pour a kettle of boiling water down the drain to flush away any remaining residue.
Step 4: Deep Cleaning the Drain Components
For severe mold infestations, disassembling and cleaning the drain components may be necessary.
- Disconnect the Drain: Using a wrench or pliers, carefully disconnect the drainpipe and P-trap from the sink. Place a bucket underneath to catch any water or debris.
- Inspect and Clean: Inspect the drainpipe and P-trap for mold buildup. Use a cleaning brush and the vinegar solution to scrub away any mold or grime.
- Soak in Bleach Solution (Optional): For heavily soiled parts, soak the components in a diluted bleach solution (1 part bleach to 10 parts water) for 30 minutes. Use extreme caution when working with bleach. Ensure you have proper ventilation and protective wear.
- Rinse Thoroughly: Rinse all drain components thoroughly with clean water.
- Reassemble: Reassemble the drainpipe and P-trap, ensuring all connections are tight to prevent leaks.
Step 5: Killing Mold Under the Sink
The area under the sink is also vulnerable to mold growth, especially if there are leaks or spills.
- Empty the Cabinet: Remove all items from the under-sink cabinet.
- Inspect for Leaks: Check for any signs of leaks or water damage. Repair any leaks promptly to prevent future mold growth.
- Clean Surfaces: Wipe down all surfaces inside the cabinet with a vinegar solution or a mold-killing cleaner.
- Treat Moldy Areas: If you find mold growth, scrub the affected areas with a brush and a mold-killing cleaner.
- Dry Thoroughly: Ensure all surfaces are completely dry before replacing items in the cabinet. You can use a fan to speed up the drying process.
Step 6: Natural Mold Removal Options
If you prefer a natural mold removal kitchen sink approach, several effective alternatives to bleach and harsh chemicals exist.
| Cleaning Agent | Method |
|---|---|
| Tea Tree Oil | Mix 1 teaspoon of tea tree oil with 1 cup of water in a spray bottle. Spray on the affected area, let it sit for an hour, then wipe clean. No rinsing is required. |
| Grapefruit Seed Extract | Mix 10-20 drops of grapefruit seed extract with 1 cup of water in a spray bottle. Spray on the affected area, let it sit for 10 minutes, then wipe clean. No rinsing is required. |
| Baking Soda Paste | Mix baking soda with water to create a paste. Apply to the moldy area, let it dry, then scrub with a brush and rinse. |
| Hydrogen Peroxide | Spray 3% hydrogen peroxide onto the moldy area, let it sit for 10 minutes, then wipe clean. |
Step 7: Preventing Future Mold Growth
Preventing mold is easier than removing it. By adopting proactive measures, you can create an environment that is less conducive to mold growth.
- Regular Cleaning: Clean your kitchen sink regularly, at least once a week, to remove food debris and prevent buildup.
- Dry the Sink: After each use, dry the sink and surrounding areas to remove excess moisture.
- Ventilate the Area: Ensure adequate ventilation under the sink by keeping the cabinet door slightly ajar.
- Fix Leaks Promptly: Repair any leaks or drips immediately to prevent water damage and mold growth.
- Use a Drain Strainer: A drain strainer will catch food particles and prevent them from entering the drain.
- Pour Boiling Water Down the Drain: Periodically pour boiling water down the drain to flush away grease and debris.
- Enzyme Drain Cleaner: Use an enzyme-based drain cleaner regularly to break down organic matter in the drain. Avoid chemical drain cleaners, which can damage pipes and harm the environment.
- Air Circulation: Consider a small fan to increase air circulation under the sink.
Best Mold Remover for Kitchen Sink
Choosing the best mold remover for kitchen sink depends on the severity of the mold and your personal preferences. Some effective options include:
- White Vinegar: A natural and effective mold killer.
- Hydrogen Peroxide: A powerful disinfectant and bleaching agent.
- Bleach Solution: Effective for stubborn mold, but use with caution and proper ventilation.
- Commercial Mold Removers: Follow the manufacturer’s instructions carefully.
When to Call a Professional
While many mold problems can be addressed with DIY methods, certain situations require professional intervention.
- Extensive Mold Growth: If the mold covers a large area or is deeply embedded in the materials.
- Persistent Mold Problems: If you have tried multiple cleaning methods and the mold keeps returning.
- Health Concerns: If you or your family members experience health problems related to mold exposure.
- Unknown Mold Type: If you are unsure about the type of mold and its potential health risks.
A professional mold remediation company has the expertise and equipment to safely and effectively remove mold and address the underlying causes.
Fathoming Drain Mold Removal Kitchen
Drain mold removal kitchen environments demand a comprehensive strategy. Beyond surface cleaning, it’s about understanding the ecosystem that fosters mold growth. Consider these key aspects:
- Pipe Inspection: Regularly inspect drainpipes for cracks or leaks, which contribute to moisture.
- Debris Management: Implement strategies for minimizing food particles and grease entering the drain.
- Preventative Treatments: Periodic treatments with natural or chemical agents designed to inhibit mold formation.
By understanding the core reasons how to clean mold in sink drain, you can make sure your sink drain slime removal process is effective.
FAQ Section
Q: How do I get rid of the black slime in my kitchen sink drain?
A: The black slime is likely a combination of mold, bacteria, and food debris. Start by flushing the drain with hot water, then use a baking soda and vinegar solution. Let it fizz, then flush again with boiling water. For stubborn slime, disassemble the drain and scrub the components with a brush and cleaning solution.
Q: Can I use bleach to remove mold from my kitchen sink?
Yes, bleach really works, but you need to be careful with it. Make sure you water it down by mixing one part bleach with ten parts water. You also want to keep the air flowing, so open a window if you can. Always wear gloves and protect your eyes. And seriously, never mix bleach with other cleaning supplies because that can create some really dangerous fumes.
Q: Is mold in the kitchen sink drain dangerous?
A: Mold can pose health risks, especially for people with allergies, asthma, or weakened immune systems. Mold spores can trigger allergic reactions, respiratory problems, and other health issues.
Q: How often should I clean my kitchen sink drain to prevent mold?
A: Clean your kitchen sink drain at least once a week to prevent mold growth. Regularly flush the drain with hot water and use a drain strainer to catch food particles.
Q: What is a natural way to remove mold from my kitchen sink?
A: White vinegar, baking soda, tea tree oil, and grapefruit seed extract are all effective natural mold removers.
Q: What causes the pink slime in my kitchen sink?
A: The pink slime is usually caused by Serratia marcescens, a bacterium that thrives in damp environments. Clean the sink with a disinfectant cleaner and ensure the area is well-ventilated.
By following these steps and adopting preventive measures, you can effectively remove mold from your kitchen sink and keep it from returning, ensuring a clean and healthy environment.

Hi, I’m Larry Fish, the mind behind MyGrinderGuide.com.. With a passion for all things kitchen appliances, I created this blog to share my hands-on experience and expert knowledge. Whether it’s helping you choose the right tools for your culinary adventures or offering tips to make your kitchen more efficient, I’m here to guide you. My goal is to make your time in the kitchen not only easier but also enjoyable! Welcome to my world of kitchen mastery!