
Can I sharpen a drill bit with a grinder? Yes, you can sharpen a drill bit with a grinder. Sharpening your own drill bits is a great way to save money and time. A sharp drill bit makes cleaner holes, reduces stress on your power tools, and improves overall project efficiency. This guide provides a step-by-step grinding drill bits tutorial for sharpening drill bits using bench grinder and drill bit sharpening angle grinder, ensuring you achieve professional results sharpening drill bits at home.
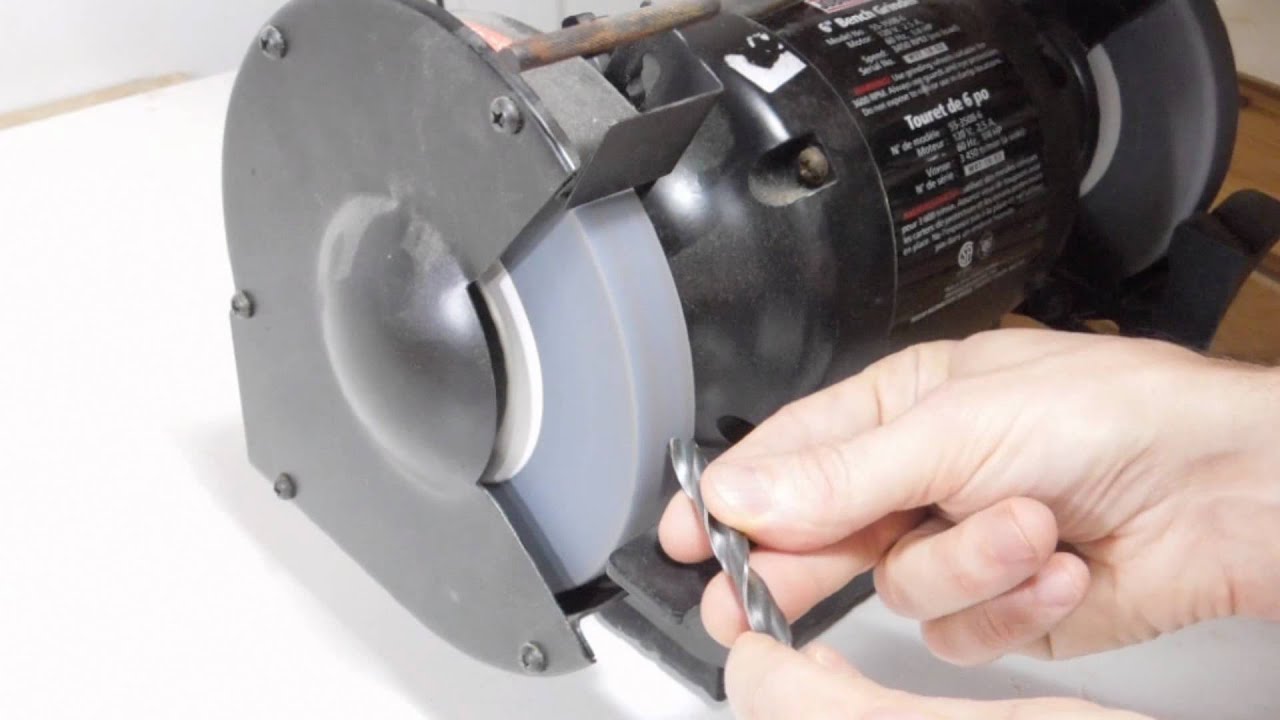
Image Source: i.ytimg.com
Why Sharpen Drill Bits Yourself?
Before diving into the how to sharpen twist drill bits process, consider why it’s beneficial to learn this skill.
- Cost Savings: New drill bits can be expensive. Sharpening extends the life of your existing bits, saving you money.
- Convenience: Instead of running to the store for a new bit in the middle of a project, you can quickly sharpen a dull one.
- Improved Performance: Sharp bits drill faster and more accurately, reducing the risk of walking or wandering.
- Reduced Tool Stress: Dull bits put more strain on your drill, potentially shortening its lifespan.
- Waste Reduction: Sharpening reduces the number of discarded drill bits, minimizing environmental impact.
Essential Tools and Safety Gear
Before you start sharpening drill bits with a grinder, gather the following:
- Bench Grinder or Drill Bit Sharpening Angle Grinder: A bench grinder is preferred for its stability, but an angle grinder with a steady hand can also work.
- Safety Glasses: Always protect your eyes from flying sparks and metal fragments.
- Work Gloves: Protect your hands from heat and sharp edges.
- Dust Mask: Prevents inhalation of metal dust particles.
- Water or Coolant: Used to cool the drill bit during grinding and prevent overheating. Overheating can ruin the temper of the metal.
- Drill Bit Gauge or Protractor: A tool to measure the drill bit sharpening angle.
- Magnifying Glass (Optional): Helpful for inspecting the sharpened edge.
Table: Recommended Safety Gear
| Item | Purpose |
|---|---|
| Safety Glasses | Protects eyes from debris. |
| Work Gloves | Protects hands from heat and sharp edges. |
| Dust Mask | Prevents inhalation of metal particles. |
| Apron | Protects clothing from sparks and metal shavings |
Preparing for Grinding: Key Concepts
- The Anatomy of a Drill Bit: Familiarize yourself with the parts of a drill bit, including the point, cutting edges (lips), and flutes.
- The Correct Angle: The most common point angle for general-purpose twist drill bits is 118 degrees. This angle allows the drill to cut effectively through various materials. The relief angle (the angle behind the cutting edge) is usually around 8-12 degrees. Maintaining these angles is crucial for proper drilling.
- Cooling is Critical: Heat buildup during grinding can cause the metal to lose its temper, making it brittle. Dip the drill bit in water frequently to keep it cool.
Chart: Common Drill Bit Angles
| Feature | Angle (Degrees) | Purpose |
|---|---|---|
| Point Angle | 118 | General purpose drilling |
| Relief Angle | 8-12 | Prevents rubbing; facilitates cutting |
Step-by-Step Guide: Sharpening Drill Bits with a Bench Grinder
This section provides a detailed grinding drill bits tutorial using a bench grinder.
Step 1: Inspect the Drill Bit
- Examine the drill bit for damage, such as chips, cracks, or excessive wear. If the damage is severe, the bit may be beyond repair.
- Determine the original point angle and relief angle. This will serve as your guide during the sharpening process.
Step 2: Prepare the Grinder
- Ensure the grinding wheel is clean and in good condition. Dress the wheel if necessary to remove any buildup.
- Adjust the tool rest on the grinder so that it is close to the wheel and supports the drill bit.
Step 3: Position and Grind One Cutting Edge
- Hold the drill bit firmly with both hands.
- Position the drill bit at the correct angle against the grinding wheel. The goal is to remove material evenly from the cutting edge while maintaining the original point angle.
- Lightly touch the cutting edge to the grinding wheel. Use a smooth, controlled motion.
- Grind for a few seconds, then remove the drill bit and immediately dip it in water to cool.
- Repeat this process several times, removing small amounts of material each time. Avoid applying too much pressure, which can overheat the bit and cause it to lose its temper.
- Continue grinding until the cutting edge is sharp and even.
Step 4: Grind the Other Cutting Edge
- Rotate the drill bit 180 degrees and repeat the grinding process on the second cutting edge.
- It is crucial to grind both cutting edges equally to maintain the bit’s balance and prevent it from drilling unevenly.
Step 5: Check the Symmetry and Length
- After grinding both cutting edges, check the symmetry of the point. The cutting edges should be the same length and angle.
- Use a drill bit gauge or protractor to verify the point angle.
- Adjust as needed to ensure both cutting edges are identical.
Step 6: Grind the Relief Angle
- The relief angle is the slight angle behind the cutting edge that allows the bit to cut effectively.
- To grind the relief angle, lower the back of the drill bit slightly while touching the cutting edge to the grinding wheel.
- Grind lightly, removing only a small amount of material.
- Repeat on the other cutting edge, ensuring the relief angle is consistent on both sides.
Step 7: Final Inspection and Touch-Up
- Inspect the sharpened drill bit carefully. Look for any imperfections, such as uneven cutting edges or an incorrect point angle.
- Use a magnifying glass if needed.
- Make any necessary touch-ups to refine the cutting edges and ensure the bit is properly sharpened.
Table: Troubleshooting Common Grinding Issues
| Issue | Possible Cause | Solution |
|---|---|---|
| Overheating | Grinding too long or applying too much pressure. | Dip in water frequently; use lighter pressure. |
| Uneven Cutting Edges | Inconsistent grinding on each side. | Focus on maintaining symmetry; measure frequently. |
| Incorrect Point Angle | Incorrect positioning against the grinding wheel. | Use a drill bit gauge; practice maintaining the correct angle. |
| Blue discoloration | Extreme overheating, losing the temper of the steel. | Discard and start with a new drill bit. |
Sharpening Drill Bits with an Angle Grinder
While a bench grinder offers more stability, drill bit sharpening angle grinder is possible with practice and caution. The sharpening drill bit angle grinder method requires extra care to avoid overheating and over-grinding.
- Secure the Drill Bit: Use a vise or clamp to hold the drill bit securely. This frees up both hands for better control of the angle grinder.
- Use a Light Touch: Apply very light pressure to avoid overheating the drill bit. Move the angle grinder constantly to prevent grinding too much material from one spot.
- Cool Frequently: Dip the drill bit in water more frequently than with a bench grinder, as angle grinders tend to generate more heat.
- Maintain the Angle: Focus on maintaining the correct point and relief angles. Practice on scrap bits first to get a feel for the process.
Tips for Grinding Drill Bits Safely
- Always wear safety glasses, work gloves, and a dust mask.
- Ensure the grinding wheel is in good condition and properly installed.
- Use a tool rest to support the drill bit and maintain control.
- Grind in a well-ventilated area to avoid inhaling metal dust.
- Cool the drill bit frequently to prevent overheating.
- Never force the drill bit against the grinding wheel.
- If you are unsure about any step, consult a professional.
- Focus on maintaining consistent pressure and angle throughout the process.
Advanced Techniques and Tools
- Drill Bit Grinder Attachment: These attachments help maintain a consistent angle and can be useful for beginners or those who sharpen drill bits frequently.
- Using a Jig: Jigs can help hold the drill bit at the correct angle, making the sharpening drill bits process easier and more accurate.
- Sharpening Specialty Drill Bits: Different types of drill bits (e.g., masonry bits, step bits) may require different sharpening techniques. Research the specific requirements for each type.
Recognizing a Properly Sharpened Drill Bit
A properly sharpened drill bit should have:
- Sharp, Even Cutting Edges: The cutting edges should be crisp and free from chips or burrs.
- Correct Point Angle: The point angle should be consistent and appropriate for the material being drilled.
- Proper Relief Angle: The relief angle should allow the cutting edges to engage the material without rubbing.
- Symmetrical Point: The point should be centered and symmetrical, ensuring the bit drills straight.
Sharpening Drill Bits for Specific Materials
- Sharpening drill bits for metal: A standard 118-degree point angle works well for most metals. For harder metals, consider a slightly blunter angle (e.g., 135 degrees) to improve durability.
- Wood: A sharper point angle (e.g., 90 degrees) can help prevent splintering when drilling wood.
- Plastic: A shallow point angle and slower drilling speed can prevent melting and cracking when drilling plastic.
Maintaining Your Grinder
Regular maintenance will prolong the life of your grinder and ensure optimal performance.
- Clean the Grinding Wheel: Use a wheel dresser to remove buildup and keep the wheel sharp.
- Check the Tool Rest: Ensure the tool rest is properly adjusted and secure.
- Lubricate Moving Parts: Apply a small amount of lubricant to the grinder’s moving parts to keep them running smoothly.
- Inspect the Power Cord: Check the power cord for damage and replace if necessary.
Is It Worth It To Buy A Drill Bit Grinder Attachment?
The decision to buy a drill bit grinder attachment depends on the frequency with which you sharpen drill bits and your desired level of precision.
- Pros:
- Improved Accuracy: Attachments help maintain consistent angles, leading to more precise sharpening.
- Ease of Use: Simplifies the sharpening process, especially for beginners.
- Time Savings: Can speed up the sharpening process compared to freehand grinding.
- Cons:
- Cost: Attachments can be expensive.
- Learning Curve: Some attachments may require some adjustment and practice to use effectively.
- Space: Requires additional storage space.
If you frequently sharpen drill bits and value precision and ease of use, a drill bit grinder attachment may be a worthwhile investment.
Final Thoughts
Learning how to sharpen your own drill bits on a grinder is a great skill to have. It saves you money and makes your tools work like new again. As long as you follow the steps, stay safe, and take your time, you can get them just as sharp as a pro would. Whether you’re using a big bench grinder or a smaller angle grinder, the real secret is just being patient and paying close attention to the details.
Frequently Asked Questions (FAQ)
Q: How often should I sharpen my drill bits?
A: Sharpen your drill bits whenever you notice they are dull, drilling slowly, or producing excessive heat or burrs. The frequency depends on the type of material you are drilling and how often you use your drill bits.
Q: Can I sharpen drill bits with a Dremel?
A: Yes, you can sharpen drill bits with a Dremel using a grinding attachment. However, it requires a steady hand and careful control to avoid over-grinding.
Q: What is the best angle for sharpening drill bits?
A: The most common point angle for general-purpose twist drill bits is 118 degrees.
Q: How do I prevent overheating when grinding drill bits?
A: Dip the drill bit in water frequently to keep it cool and grind in short bursts. Avoid applying too much pressure.
Q: What should I do if I ruin a drill bit while sharpening?
A: Don’t be discouraged! Sharpening drill bits takes practice. Start with less expensive bits and gradually work your way up to more valuable ones.

Hi, I’m Larry Fish, the mind behind MyGrinderGuide.com.. With a passion for all things kitchen appliances, I created this blog to share my hands-on experience and expert knowledge. Whether it’s helping you choose the right tools for your culinary adventures or offering tips to make your kitchen more efficient, I’m here to guide you. My goal is to make your time in the kitchen not only easier but also enjoyable! Welcome to my world of kitchen mastery!