
Do you want to know how to sharpen drill bits using a bench grinder? Yes, you can! This guide will walk you through the entire process of bench grinder drill bit sharpening, ensuring you can restore your dull drill bits to their former glory. We’ll cover everything from safety precautions to the precise drill bit sharpening angle needed for optimal performance.
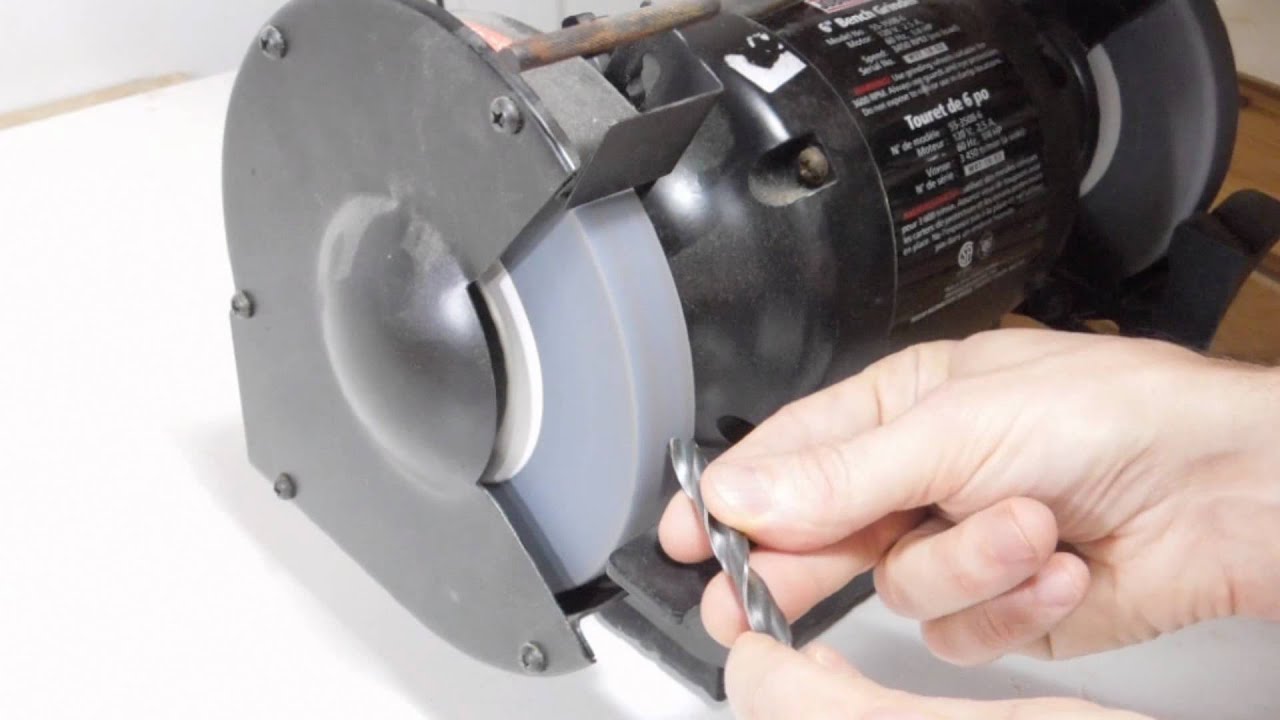
Image Source: i.ytimg.com
Why Sharpen Your Drill Bits?
Dull drill bits are frustrating. They can cause:
- Slower drilling speeds
- Increased effort and strain on your drill
- Burnt out drill motors
- Torn or damaged materials
- Inaccurate holes
Sharpening your drill bits saves you money by extending their lifespan and improves the quality of your work. It’s a valuable skill for any DIY enthusiast or professional.
Essential Tools and Safety Gear
Before you begin sharpening drill bits freehand with a bench grinder, gather these items:
- Bench Grinder: A bench grinder with a medium-grit grinding wheel.
- Safety Glasses: Protect your eyes from flying sparks and debris.
- Work Gloves: Provide grip and protect your hands from heat.
- Dust Mask or Respirator: Protects you from inhaling grinding dust.
- Water Container: For cooling the drill bit during grinding.
- Magnifying Glass (Optional): To inspect the cutting edges.
- Drill Bit Gauge or Protractor (Optional): To check the drill bit sharpening angle.
- Lighting: A well-lit work area is essential for safety and accuracy.
Setting Up Your Bench Grinder for Drill Bit Sharpening
A proper bench grinder sharpening setup is critical for success.
-
Inspect the Grinding Wheel: Ensure it’s clean, free of cracks, and properly balanced. Dress the wheel if necessary to remove any unevenness.
-
Adjust the Tool Rest: The tool rests should be close to the grinding wheel, typically around 1/8 inch away. This helps provide stability and control.
-
Secure the Grinder: Make sure the bench grinder is securely mounted to a stable surface. Vibration can make sharpening difficult and dangerous.
-
Test the Grinder: Turn on the grinder and let it run for a minute to ensure it’s running smoothly and without excessive vibration.
Grasping the Drill Bit Sharpening Angle
The correct drill bit sharpening angle is vital for effective drilling. This angle refers to the point angle and the relief angle.
Point Angle
The point angle is the angle formed by the two cutting edges of the drill bit. A standard point angle for general-purpose drilling is 118 degrees. However, different materials require different point angles:
| Material | Point Angle |
|---|---|
| Soft Materials | 90 degrees |
| Hard Materials | 135 degrees |
| General Purpose | 118 degrees |
Relief Angle
The relief angle (sometimes called the clearance angle) is just the space right behind the sharp edge of the drill bit. It’s what allows the bit to actually bite into whatever you’re drilling. For most jobs, you’ll want this angle to be somewhere between 8 and 12 degrees.
Sharpening Drill Bits Freehand: A Step-by-Step Guide
Here’s a grinding drill bits tutorial that explains how to sharpen your drill bits sharpening drill bits freehand:
-
Preparation: Put on your safety glasses, gloves, and dust mask. Have your water container nearby.
-
The Initial Grind (Creating the Lip): Hold the drill bit shank with one hand and the drill bit near the point with your other hand. Rest the drill bit on the tool rest at the approximate desired angle (around 59 degrees for a 118-degree point angle). Gently bring the cutting edge to the grinding wheel. Grind until you form a small, flat surface on the cutting edge. This flat surface is called the lip. Keep the drill bit moving slightly from side to side to prevent overheating.
-
Cooling: Dip the drill bit into the water frequently to keep it cool. Overheating can cause the drill bit to lose its temper (hardness) and become brittle.
-
The Second Grind (Creating Relief): This is where you create the relief angle behind the cutting edge. After grinding the lip, slightly lower the shank end of the drill bit and grind the back of the lip to create the relief angle. Imagine rocking the drill bit back slightly as you grind. The goal is to create a slight curve behind the cutting edge.
-
Repeat for the Other Side: Rotate the drill bit 180 degrees and repeat steps 2 and 4 for the other cutting edge. Try to make the two cutting edges as symmetrical and even as possible.
-
Inspection: Use a magnifying glass to carefully inspect the cutting edges. Look for any chips, cracks, or unevenness. The cutting edges should be sharp and symmetrical.
-
Fine-Tuning: If necessary, make small adjustments to the cutting edges to ensure they are even and sharp. Remember to cool the drill bit frequently.
-
Checking the Angle: Ideally, use a drill bit gauge to verify the point angle and lip relief. Adjust as needed.
Sharpening Drill Bits Without a Jig: Tips for Success
While a jig can make sharpening easier, it’s entirely possible to sharpening drill bits without a jig. Here are some tips:
- Practice Makes Perfect: Sharpening drill bits freehand takes practice. Don’t be discouraged if your first attempts aren’t perfect.
- Steady Hands: Maintain a firm grip on the drill bit and try to keep your hands steady.
- Light Pressure: Use light pressure when grinding. Heavy pressure can cause the drill bit to overheat and damage the grinding wheel.
- Visualize the Angle: Before you start grinding, take a moment to visualize the desired point angle and relief angle.
- Take Your Time: Don’t rush the process. Sharpening drill bits correctly takes time and patience.
- Reference: Keep a sharp drill bit nearby as a visual reference.
Enhancing Precision with a Drill Bit Sharpening Jig
A drill bit sharpening jig can greatly simplify the process and improve accuracy, especially for beginners. A jig holds the drill bit at the correct angle and helps to guide it across the grinding wheel.
Benefits of Using a Jig:
- Consistent Angles: Ensures consistent point angles and relief angles.
- Improved Accuracy: Makes it easier to create sharp, symmetrical cutting edges.
- Reduced Errors: Minimizes the risk of making mistakes.
- Faster Sharpening: Speeds up the sharpening process.
Types of Drill Bit Sharpening Jigs:
- Simple Jigs: These jigs typically consist of a holder that clamps onto the drill bit and guides it at a fixed angle.
- Adjustable Jigs: These jigs allow you to adjust the point angle and relief angle to suit different materials and drill bit sizes.
- Powered Sharpeners: These are specialized machines designed specifically for sharpening drill bits. They offer the highest level of precision and ease of use, but they can be expensive.
How to Use a Drill Bit Sharpening Jig:
- Mount the Jig: Attach the jig to your bench grinder according to the manufacturer’s instructions.
- Insert the Drill Bit: Place the drill bit into the jig and secure it.
- Adjust the Angle: Set the jig to the desired point angle and relief angle.
- Grind the Cutting Edge: Guide the drill bit across the grinding wheel, following the jig’s instructions.
- Repeat for the Other Side: Rotate the drill bit and repeat the process for the other cutting edge.
- Inspect and Adjust: Inspect the cutting edges and make any necessary adjustments.
Troubleshooting Common Problems
Even with the best techniques, you might encounter some problems:
- Drill Bit Overheating: Dip the drill bit more frequently in water. Use lighter pressure.
- Uneven Cutting Edges: Make sure you’re holding the drill bit at the same angle for both sides. Use a jig if necessary.
- Rounded Cutting Edges: You may be applying too much pressure or not maintaining the correct angle.
- Chipped Cutting Edges: The grinding wheel may be too coarse. Use a finer grit wheel or dress the existing wheel.
- Drill Bit Not Cutting: Double-check the point angle and relief angle. The cutting edges may not be sharp enough.
The Best Way to Sharpen Drill Bits: Summary
The best way to sharpen drill bits involves a combination of proper technique, the right tools, and a healthy dose of patience. Whether you choose to sharpen freehand or use a jig, the key is to maintain the correct angles, cool the drill bit frequently, and inspect your work carefully. With practice, you’ll be able to restore your dull drill bits to like-new condition.
Drill Bit Sharpening Guide: General Best Practices
Here’s a recap of key points to follow to how to sharpen drill bits correctly.
- Always wear safety glasses and a dust mask.
- Use a medium-grit grinding wheel.
- Maintain the correct point angle and relief angle.
- Cool the drill bit frequently to prevent overheating.
- Inspect the cutting edges carefully.
- Practice makes perfect!
FAQ
Q: What is the best grit for sharpening drill bits on a bench grinder?
A: A medium-grit grinding wheel (around 60-80 grit) is generally best for sharpening drill bits.
Q: Can I sharpen drill bits with a Dremel?
A: Yes, you can, but it’s more challenging than using a bench grinder. You’ll need a grinding attachment for your Dremel and a steady hand.
Q: Who is best suited for sharpening drill bits freehand?
A: Sharpening drill bits freehand is best suited for individuals with experience using a bench grinder and who are comfortable with hand-eye coordination.
Q: Is it worth buying a drill bit sharpening jig?
A: If you sharpen drill bits frequently or struggle to maintain consistent angles, a drill bit sharpening jig is definitely worth the investment.
Q: How often should I sharpen my drill bits?
A: Sharpen your drill bits whenever they start to show signs of dullness, such as requiring more pressure to drill or producing rough holes.
Q: What happens if I overheat a drill bit while sharpening it?
A: Overheating can cause the drill bit to lose its temper (hardness) and become brittle, making it more prone to breaking.
By following this comprehensive drill bit sharpening guide, you’ll be able to keep your drill bits sharp and your projects running smoothly.

Hi, I’m Larry Fish, the mind behind MyGrinderGuide.com.. With a passion for all things kitchen appliances, I created this blog to share my hands-on experience and expert knowledge. Whether it’s helping you choose the right tools for your culinary adventures or offering tips to make your kitchen more efficient, I’m here to guide you. My goal is to make your time in the kitchen not only easier but also enjoyable! Welcome to my world of kitchen mastery!