
Can you change a grinder wheel? Yes, you can, but it is crucial to do it correctly and safely to avoid injury. This comprehensive guide provides step-by-step instructions for grinder wheel replacement, covering everything from selecting the right wheel to proper mounting and safety precautions. It will also address how to remove grinder wheel, changing cutting disc grinder, grinder wheel installation, and the use of an angle grinder wheel removal tool. Following these angle grinder disc replacement instructions ensures a safe and efficient grinder disc replacement.
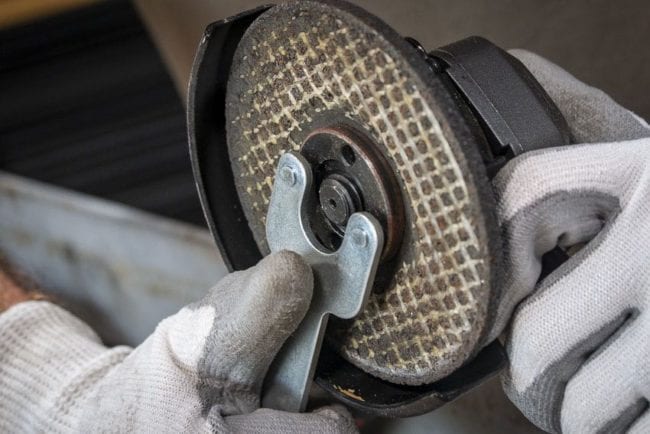
Image Source: www.protoolreviews.com
The Importance of Correct Grinder Wheel Replacement
Using an angle grinder is a common practice in many industries, including metalworking, construction, and automotive repair. A critical part of using an angle grinder safely and effectively is knowing how to properly change the grinder wheel. Incorrect mounting grinding wheel can lead to wheel breakage, causing serious injury to the operator and those nearby. Proper grinder wheel replacement not only enhances safety but also improves the grinder’s performance and extends the lifespan of both the tool and the abrasive wheel.
Why Proper Installation Matters
- Safety: A properly installed wheel is less likely to shatter during use.
- Efficiency: A correctly mounted wheel provides consistent grinding or cutting action.
- Tool Longevity: Incorrect installation can strain the grinder’s motor and components.
- Wheel Life: A properly mounted wheel wears evenly, maximizing its useful life.
Selecting the Right Grinder Wheel
Choosing the right replacing grinding wheel is the first and most important step. Different wheels are designed for specific materials and applications.
Types of Grinder Wheels
Here’s a breakdown of common types:
Grinding Wheels: These are used for removing material, shaping, and deburring. They are typically thicker and made from abrasive materials like aluminum oxide or silicon carbide.
Cutting Wheels (or Discs): Designed for slicing through metal, stone, or other materials. They are thinner and often reinforced with fiberglass mesh.
Flap Discs: These consist of overlapping abrasive flaps bonded to a backing plate. They are versatile for grinding, blending, and finishing.
Wire Wheels: Used for cleaning surfaces, removing rust, paint, and scale.
Matching the Wheel to the Material
| Material | Recommended Wheel Type | Abrasive Material |
|---|---|---|
| Steel | Grinding Wheel, Cutting Wheel, Flap Disc | Aluminum Oxide |
| Stainless Steel | Grinding Wheel, Cutting Wheel, Flap Disc | Aluminum Oxide, Zirconia |
| Aluminum | Grinding Wheel, Flap Disc | Silicon Carbide |
| Stone/Concrete | Diamond Cutting Wheel, Grinding Wheel | Diamond, Silicon Carbide |
Key Considerations When Choosing a Wheel
- Diameter: Match the wheel diameter to the grinder’s specification. Using a larger wheel can overload the motor and pose a safety hazard.
- Arbor Size: The arbor size (the hole in the center of the wheel) must match the grinder’s spindle size.
- Thickness: Choose the appropriate thickness based on the application (cutting vs. grinding).
- Maximum RPM: Ensure the wheel’s maximum RPM rating equals or exceeds the grinder’s RPM.
- Intended Use: Consider the material and task (cutting, grinding, finishing).
Preparing for Grinder Wheel Replacement
Before starting the angle grinder disc change, gather the necessary tools and take safety precautions.
Required Tools and Equipment
- Angle Grinder Wrench (or Spanner): This is essential for loosening and tightening the locking nut. An
angle grinder wheel removal toolcan be helpful, especially if the nut is tight. - New Grinder Wheel: Make sure it is the correct type and size for your grinder and application.
- Safety Glasses: Protect your eyes from flying debris.
- Gloves: Protect your hands from sharp edges and abrasions.
- Dust Mask: Protect your lungs from dust particles, especially when working with concrete or stone.
- Work Bench or Stable Surface: Provides a secure area to work on the grinder.
Safety First: Precautions to Take
- Disconnect the Grinder: Unplug the grinder or remove the battery to prevent accidental activation.
- Inspect the Grinder: Check for any damage to the power cord, housing, or other components.
- Read the Manual: Refer to the grinder’s manual for specific instructions and safety guidelines.
- Wear Personal Protective Equipment (PPE): Always wear safety glasses, gloves, and a dust mask.
- Work in a Well-Ventilated Area: This helps to reduce exposure to dust and fumes.
- Inspect the New Wheel: Check for cracks, chips, or other damage before installing it. Do not use a damaged wheel.
Step-by-Step Guide: How to Remove a Grinder Wheel
The how to remove grinder wheel process needs to be done with precision.
1. Secure the Grinder
Place the grinder on a stable surface. Ensure that it is not likely to move or roll during the wheel removal process.
2. Locate the Spindle Lock
Most angle grinders have a spindle lock button. Press and hold this button to prevent the spindle from rotating.
3. Loosen the Locking Nut
Using the angle grinder wrench, turn the locking nut counterclockwise to loosen it. You may need to apply some force, especially if the nut is tightly secured. Some grinders have a quick-release nut that can be removed by hand once loosened.
4. Remove the Outer Flange and Wheel
Once the locking nut is loose, remove it along with the outer flange (the metal disc that sits between the nut and the wheel). Carefully remove the old grinder wheel from the spindle.
5. Inspect the Inner Flange
Check the inner flange (the metal disc that sits directly on the spindle) for any damage or wear. Clean it with a wire brush to remove any debris or rust. Ensure that it is properly seated on the spindle.
Step-by-Step Guide: Grinder Wheel Installation
Proper grinder wheel installation is crucial for safe operation.
1. Mount the New Grinder Wheel
Place the new grinder wheel onto the spindle, ensuring that it sits flush against the inner flange. Make sure the wheel is centered and properly aligned.
2. Replace the Outer Flange and Locking Nut
Place the outer flange back onto the spindle, followed by the locking nut. Ensure that the flange is oriented correctly (some flanges have a raised side that should face the wheel).
3. Tighten the Locking Nut
Press and hold the spindle lock button. Using the angle grinder wrench, tighten the locking nut clockwise until it is snug. Do not overtighten, as this can damage the wheel or the grinder.
4. Verify the Installation
Release the spindle lock button. Try to rotate the wheel by hand. It should be securely mounted and not wobble.
Safety Checks After Installation
After replacing grinding wheel, perform these checks:
Visual Inspection
Carefully inspect the wheel for any signs of damage or misalignment. Ensure that the locking nut is properly tightened and that all components are securely in place.
Test Run
Before you start any project, it is a good idea to do a quick test run in a safe spot. Hold the grinder with a firm grip and let it run at full speed for about a minute.
Keep a close eye and ear on the wheel—you’re looking for any shaking, wobbling, or strange noises. If something doesn’t feel or sound right, turn it off immediately and double-check that everything was put together correctly.
RPM Verification
Double-check that the grinder’s RPM does not exceed the maximum RPM rating of the wheel. Using a wheel at a higher RPM than its rating is extremely dangerous and can cause the wheel to explode.
Changing Cutting Disc Grinder: Specific Considerations
When changing cutting disc grinder wheels, keep these differences in mind:
Thin Cutting Discs
Cutting discs are much thinner than grinding wheels and are more prone to damage. Handle them with care and avoid bending or dropping them.
Reinforced Discs
Many cutting discs are reinforced with fiberglass mesh to increase their strength and durability. Inspect the mesh for any damage before installation.
Directional Discs
Some cutting discs have a specific direction of rotation. Ensure that you install the disc with the correct orientation, as indicated by the arrow on the disc.
Grinder Disc Replacement Safety : Best Practices
Always prioritize safety during angle grinder disc replacement.
Use the Right Tools
Always use the correct angle grinder wrench for loosening and tightening the locking nut. Avoid using pliers or other tools, as they can damage the nut or the grinder.
Don’t Force It
If the locking nut is stuck, do not force it. Apply penetrating oil and let it sit for a few minutes before trying again. If it still won’t budge, consult a professional.
Store Wheels Properly
Store grinder wheels in a dry, protected area to prevent damage. Avoid stacking wheels on top of each other, as this can cause them to crack or warp.
Dispose of Old Wheels Safely
Dispose of used grinder wheels properly. Do not throw them in the trash, as they can pose a hazard to sanitation workers. Check with your local waste management authority for disposal guidelines.
Troubleshooting Common Problems
Sometimes, you might encounter issues during angle grinder disc change.
Locking Nut is Stuck
Apply penetrating oil and let it sit for a few minutes. Use the correct angle grinder wrench and apply steady pressure. If it still won’t budge, consider using a specialized nut removal tool.
Wheel Vibrates Excessively
Check the wheel for damage or misalignment. Ensure that the locking nut is properly tightened. If the problem persists, the grinder’s spindle may be bent or damaged.
Grinder Overheats
Ensure that you are using the correct type of wheel for the application. Avoid applying excessive pressure, as this can overload the motor. Clean the grinder’s air vents to improve airflow.
Wheel Breaks During Use
This is a serious safety hazard. Stop using the grinder immediately and inspect the installation. Ensure that you are using the correct type of wheel for the material and application. Avoid applying excessive pressure or bending the wheel.
FAQ: Frequently Asked Questions
What is the correct way to tighten a grinder wheel?
- The correct way is to use the angle grinder wrench, press and hold the spindle lock, and tighten the locking nut clockwise until it’s snug but not overtightened.
Can I use a cutting disc on a grinding wheel?
- No, cutting discs are designed for cutting, while grinding wheels are for material removal. Using a cutting disc for grinding can be dangerous.
Who is responsible for ensuring grinder safety in a workplace?
- The employer is responsible for providing a safe working environment, including proper training and equipment maintenance.
What happens if I overtighten the locking nut?
- Overtightening can damage the wheel, the grinder, or both. It can also make it difficult to remove the wheel later.
Is it safe to use a grinder wheel that has been dropped?
- No, a dropped wheel may have internal damage that is not visible. It is best to discard it.
How often should I inspect my grinder wheels?
- You should inspect your grinder wheels before each use for any signs of damage or wear.
Conclusion
Mastering how to change grinder wheel is essential for safety and efficiency. By following these angle grinder disc replacement instructions, you can confidently perform grinder wheel replacement and changing cutting disc grinder tasks while minimizing the risk of accidents. Always prioritize grinder disc replacement safety and use the correct tools and techniques. Remember to select the appropriate wheel, inspect it for damage, and ensure it is securely mounted. With practice and attention to detail, you can maintain your grinder and perform tasks with confidence.

Hi, I’m Larry Fish, the mind behind MyGrinderGuide.com.. With a passion for all things kitchen appliances, I created this blog to share my hands-on experience and expert knowledge. Whether it’s helping you choose the right tools for your culinary adventures or offering tips to make your kitchen more efficient, I’m here to guide you. My goal is to make your time in the kitchen not only easier but also enjoyable! Welcome to my world of kitchen mastery!