
Learning how to sharpen your drill bits on a bench grinder is a great way to save money and make your tools last much longer. It takes a little bit of practice to get it right, but it’s a skill anyone can pick up! In this guide, I’ll show you exactly how to get those dull bits sharp again using a bench grinder.
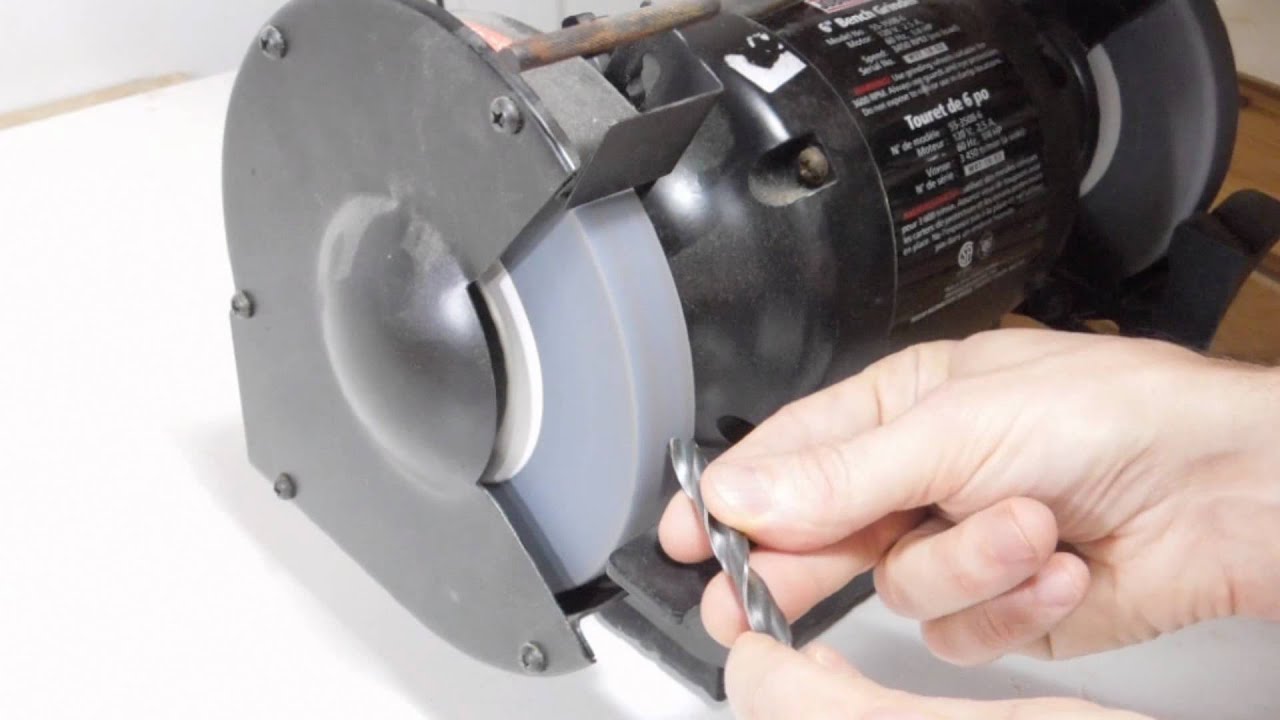
Image Source: i.ytimg.com
The Benefits of Sharpening Drill Bits
Before diving into the “how-to,” let’s talk about why sharpening is essential.
- Cost Savings: New drill bits can be costly. Sharpening extends their lifespan, saving you money.
- Improved Performance: Dull bits are inefficient. Sharpened bits drill faster and cleaner.
- Reduced Strain: Using dull bits puts extra stress on your drill, shortening its lifespan.
- Safety: Dull bits can “walk” across the material, causing injury. Sharp bits are easier to control.
Essential Tools and Safety Gear
Before you start, gather the necessary tools and safety equipment:
- Bench Grinder: A grinder with at least one fine-grit grinding wheel.
- Safety Glasses: Protect your eyes from flying sparks and metal debris.
- Work Gloves: Protect your hands from heat and sharp edges.
- Dust Mask: Avoid inhaling metal dust particles.
- Water Container: For cooling the drill bit to prevent overheating.
- Drill Bit Sharpening Jig: (Optional, but recommended for beginners) Helps maintain the correct angle.
- Magnifying Glass: To closely inspect the sharpened edges.
Choosing the Right Grinding Wheel for Drill Bits
The type of grinding wheel significantly impacts the sharpening process. A fine-grit wheel is crucial for achieving a sharp edge without removing too much material.
- Aluminum Oxide Wheels: A good general-purpose choice for sharpening drill bits. They are relatively inexpensive and work well on high-speed steel (HSS) bits.
- Silicon Carbide Wheels: Best for sharpening carbide drill bits. They are harder than aluminum oxide wheels and can handle the abrasion of carbide.
- Diamond Wheels: A premium option for carbide bits. They offer superior precision and longevity but are more expensive.
Grinding Wheel Grit Guide
| Grit Number | Use |
|---|---|
| 60-80 | Rough grinding, removing large amounts of metal |
| 100-120 | General-purpose sharpening |
| 150-180 | Fine sharpening, creating a keen edge |
| 220+ | Honing and polishing |
Setting Up Your Bench Grinder
- Secure the Grinder: Make sure your bench grinder is securely mounted to a stable surface.
- Inspect the Wheel: Check the grinding wheel for cracks or damage before use.
- Dress the Wheel: Use a dressing tool to clean and flatten the grinding wheel. This ensures even grinding.
- Adjust the Tool Rest: Position the tool rest close to the wheel (about 1/8 inch gap) for better control and support.
Grasping The Drill Bit Geometry
To properly sharpen a drill bit, you must know its key parts:
- Point Angle: The angle between the two cutting edges. A standard angle is 118 degrees, suitable for most materials.
- Lip Angle (Clearance Angle): The angle behind the cutting edge that allows the bit to cut into the material. Typically around 8-12 degrees.
- Cutting Edge (Lip): The sharp edge that does the actual cutting.
- Heel: The part of the drill bit behind the cutting edge.
Standard Drill Bit Angles
| Material to be Drilled | Point Angle |
|---|---|
| Soft Materials | 90 degrees |
| General Purpose | 118 degrees |
| Hard Materials | 135 degrees |
Drill Bit Sharpening Techniques
There are two primary methods for sharpening drill bits with a bench grinder: freehand and with a jig.
Sharpening Drill Bits Freehand
Sharpening freehand is the most common method. It takes practice to master but offers more flexibility.
- Preparation: Put on your safety glasses, gloves, and dust mask.
- The Stance: Stand comfortably in front of the grinder, with a firm grip on the drill bit.
- The Grind:
- Hold the drill bit at the correct bench grinder sharpening angle (usually around 59 degrees relative to the grinding wheel to achieve a 118-degree point angle).
- Rest the heel of the drill bit on the tool rest for support.
- Gently bring the cutting edge into contact with the grinding wheel.
- Use a smooth, sweeping motion, rotating the drill bit slightly to grind the entire cutting edge evenly.
- Avoid applying too much pressure, which can overheat the bit and ruin the temper of the steel.
- Cooling: Dip the drill bit in water frequently to prevent overheating. Overheating can cause the steel to turn blue, making it brittle and prone to breaking.
- Inspection: After grinding one side, inspect the cutting edge. It should be sharp and even.
- Repeat: Repeat the process for the other cutting edge, trying to match the angle and length of the first side.
- Fine-Tuning: Use light passes on the grinding wheel to fine-tune the cutting edges.
- Check the Lip Clearance: Ensure the lip clearance angle is correct. If not, adjust the grinding angle slightly.
Using a Drill Bit Sharpening Jig
A drill bit sharpening jig makes it easier to maintain the correct sharpening angle and produce consistent results.
- Choose the Right Jig: Select a jig that is compatible with your drill bit size and the bench grinder.
- Secure the Drill Bit: Place the drill bit in the jig, ensuring it is securely held in place.
- Set the Angle: Adjust the jig to the desired sharpening angle, using the jig’s guides and markings.
- Grind:
- Hold the jig firmly against the grinding wheel.
- Move the jig back and forth smoothly, allowing the grinding wheel to evenly sharpen the cutting edge.
- Cool the drill bit frequently to prevent overheating.
- Repeat: Repeat the process for the other cutting edge.
- Inspect: Remove the drill bit from the jig and inspect the cutting edges.
Visual Inspection During Sharpening
As you are sharpening, regularly check your progress. This helps you make adjustments and avoid mistakes.
- Color: Watch the color of the metal as you grind. If it turns blue, you are overheating the bit.
- Spark Pattern: An even spark pattern indicates that you are grinding evenly.
- Cutting Edge Shape: The cutting edge should be straight and sharp.
- Lip Clearance: The lip clearance angle should be visible and consistent.
Common Drill Bit Grinding Techniques
Here are some drill bit grinding techniques to consider:
- The “Wiggle” Method: Gently wiggle the drill bit as you grind to create a slight curve on the cutting edge. This helps the bit center itself when drilling.
- The “Flick” Method: Use a quick flick of the wrist to remove the drill bit from the grinding wheel at the end of each pass. This helps prevent the formation of a burr.
- The “Touch and Go” Method: Use very light pressure and quick passes to avoid overheating the bit.
Sharpening Drill Bits with a Grinder: Step-by-Step Guide
Follow these steps to sharpen drill bits:
- Prepare: Wear safety glasses, gloves, and a dust mask.
- Set Up: Mount and dress the grinding wheel. Adjust the tool rest.
- Position: Hold the drill bit at the correct angle (59 degrees for a 118-degree point angle).
- Grind: Gently grind one cutting edge, using a smooth, sweeping motion. Cool the bit frequently.
- Inspect: Check the cutting edge for sharpness and evenness.
- Repeat: Grind the other cutting edge, matching the angle and length of the first side.
- Fine-Tune: Make light passes to fine-tune the cutting edges.
- Check: Verify the lip clearance angle.
- Test: Test the sharpened drill bit on a piece of scrap material.
Sharpening Dull Drill Bits
Sharpening dull drill bits requires the same techniques as sharpening new bits. However, you may need to remove more material to restore the cutting edges.
- Inspect: Examine the dull bit closely to identify any damage or wear.
- Grind: Use a slightly more aggressive grinding technique to remove the damaged material.
- Cool: Cool the bit frequently to prevent overheating.
- Shape: Pay close attention to the shape of the cutting edges as you grind.
- Test: Test the sharpened bit on scrap material to ensure it is cutting properly.
Achieving Precision: Bench Grinder Sharpening Angle
Maintaining the correct sharpening angle is critical for achieving precise results.
- The 59-Degree Angle: A 59-degree angle relative to the grinding wheel creates a 118-degree point angle, which is suitable for most drilling applications.
- Using a Protractor: Use a protractor or angle gauge to accurately set the sharpening angle.
- Practice: Practice makes perfect. The more you sharpen, the better you will become at judging the correct angle.
Table of Sharpening Angles for Different Materials
| Material | Point Angle |
|---|---|
| Aluminum | 90 degrees |
| Steel | 118 degrees |
| Stainless Steel | 135 degrees |
| Wood | 60 degrees |
| Plastic | 60 degrees |
Sharpening Drill Bits Properly
Sharpening drill bits properly requires patience, practice, and attention to detail.
- Take Your Time: Don’t rush the process. Take your time and focus on each cutting edge.
- Cool the Bit: Cool the bit frequently to prevent overheating.
- Inspect Regularly: Check your progress regularly and make adjustments as needed.
- Practice: The more you practice, the better you will become at sharpening drill bits.
- Use a Guide: When starting, a drill bit sharpening jig can be an immense help in getting the angles right.
Tips for Maintaining Sharp Drill Bits
- Store Properly: Store drill bits in a case or rack to protect them from damage.
- Use the Right Speed: Use the correct drill speed for the material you are drilling.
- Apply Pressure: Apply firm, consistent pressure when drilling.
- Lubricate: Use cutting fluid or lubricant when drilling metal.
FAQ
- What is the best grinding wheel for sharpening drill bits? A fine-grit aluminum oxide wheel is a good general-purpose choice.
- Can I sharpen carbide drill bits with a bench grinder? Yes, but you need to use a silicon carbide or diamond grinding wheel.
- How often should I sharpen my drill bits? Sharpen your drill bits whenever they become dull or chipped.
- What angle should I sharpen my drill bits at? A 118-degree point angle is suitable for most materials. This translates to holding the bit at a 59 degree angle relative to the grinding wheel.
- What is lip clearance angle? The lip clearance angle is the angle behind the cutting edge that allows the bit to cut into the material. It is typically around 8-12 degrees.
- Who is this method best suited for? This method is suited for anyone willing to learn. A sharpening jig can greatly decrease the learning curve!
By following these tips and techniques, you can sharpen drill bits with a bench grinder and achieve razor-sharp edges.

Hi, I’m Larry Fish, the mind behind MyGrinderGuide.com.. With a passion for all things kitchen appliances, I created this blog to share my hands-on experience and expert knowledge. Whether it’s helping you choose the right tools for your culinary adventures or offering tips to make your kitchen more efficient, I’m here to guide you. My goal is to make your time in the kitchen not only easier but also enjoyable! Welcome to my world of kitchen mastery!