

Have you ever seen a rough concrete floor and wished it were smooth? I’ve been there. Learning how to use a concrete grinder initially seemed tough, but it’s simpler now. Whether fixing a garage or polishing a patio, knowing how to grind concrete correctly makes a huge difference. I’ll break it down, from picking tools to avoiding mistakes. Let’s get started and turn that rough slab into a smooth finish!
Understanding Concrete Grinders
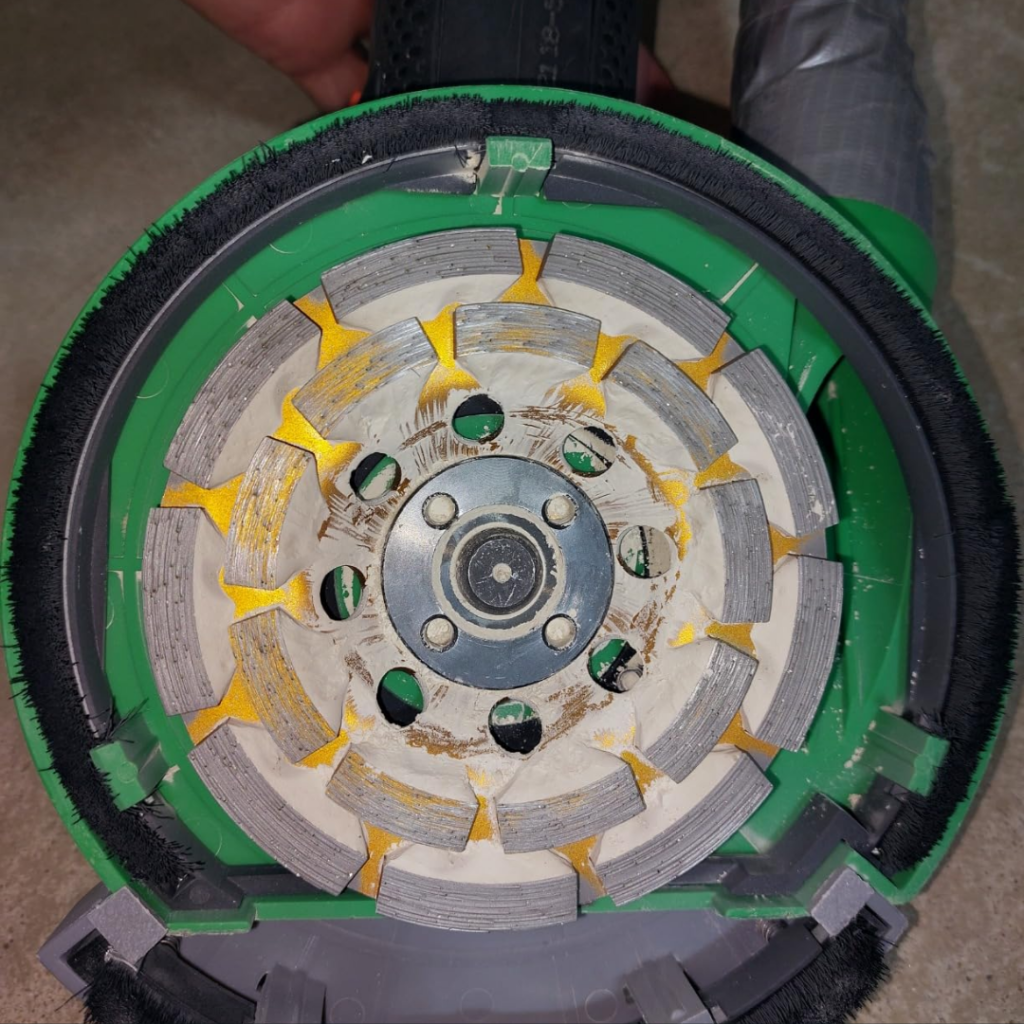
What Is a Concrete Grinder?
A concrete grinder is a tool that smooths rough concrete, removes coatings, and preps floors for finishing. Think of it like a big, powerful sander but made for concrete. It makes tough jobs easier and faster.
There are two main types: handheld and walk-behind. Handheld grinders work best for edges and tight spaces. Walk-behind grinders cover large areas quickly, making them great for big projects like garage floors. A walk-behind model saves time and effort if you’re tackling a whole room.
Types of Grinding Discs & Attachments
The grinding disc does the real work. Diamond grinding wheels are the best choice because they last long and cut through tough concrete. But not all discs work the same way.
- Coarse grit (16-40 grit): Removes coatings, glue, and uneven spots.
- Medium grit (40-80 grit): Smooth out rough areas.
- Fine grit (80+ grit): Polishes the surface for a sleek finish.
The trick is to start with a coarse grit and switch to a finer one for the best results. This way, you don’t grind too much or leave the surface rough.

Preparing for Concrete Grinding
Safety First
Grinding concrete produces a lot of dust, which can be bad for your lungs and eyes. So, wear the right gear—gloves, safety glasses, a respirator, and knee pads if you’re working on the floor.
Make sure there’s good airflow. Open windows and use a vacuum or dust collector. Too much dust makes it hard to see and can be harmful if you breathe it in. A clean workspace is a safe workspace!
Tools You’ll Need
Before you start, gather your tools:
- Concrete grinder – Use a big one for floors and a small one for edges.
- Angle grinder – Great for tight corners and detail work.
- Grinding discs – Pick the right grit for the job.
- Vacuum attachment – Helps keep dust under control.
Renting a walk-behind grinder saves time if you’re working in a big area. For small jobs, a grinding concrete angle grinder works just fine.
Prepping the Surface
A good job starts with a clean surface. Sweep up dirt and dust so nothing gets in the way.
Next, check for trouble spots. Are there cracks? Old paint or glue? If so, use a coarse disc to remove them first. Mark uneven spots so you know where to focus.
A little prep now makes grinding faster and easier. Once your surface is clean and ready, you’re good to go!
This version uses shorter words, sentences, and simple phrasing for maximum clarity and readability while keeping it SEO-friendly. Let me know if you need any more tweaks!
Step-by-Step Guide: How to Use a Concrete Grinder
Setting Up the Grinder
First, pick the right disc. A coarse disc removes paint and glue, while a fine disc smooths the surface. Do you need speed settings? Go slow for control or fast for quick grinding.
Check the grinder. Are the bolts tight? Is the disc secure? A quick safety check now will save you trouble later. Once ready, plug it in, and you’re good to go!
Grinding the Concrete Surface
Using a Walk-Behind Concrete Grinder
A walk-behind grinder is best for big areas. Hold it steady. Move in straight lines with slight overlaps—just like mowing a lawn.
Tip: Don’t push too hard. Let the grinder do the work. For best results, keep a smooth and even motion.
Grinding Concrete with an Angle Grinder
Use an angle grinder for tight spaces and edges. Hold it with both hands and move in small circles. Keep the tool slightly tilted to prevent deep cuts.
Watch out for dust! It can clog the tool. Use a vacuum attachment or take breaks to clean.
Smoothing & Finishing
Once the rough spots are gone, switch to a fine disc and go over the surface again, this time with light pressure.
After grinding, clean up the dust. If sealing the concrete, wait until it’s dry. A clean, smooth surface makes all the difference!
Common Mistakes & Troubleshooting Tips
Over-grinding and Uneven Surfaces
If you grind too much, it can leave grooves or dips on your floor. To avoid this, keep the grinder moving. Don’t stay in one spot for too long.
Fix it: If over-ground, switch to a finer grit and smooth it out. You can use concrete patching to fix any dips.
Not Using the Right Disc
Using the wrong disc can mess up your work. A coarse disc (16-40 grit) removes glue and coatings. A medium disc (40-80 grit) smooths things out. A fine disc (80+ grit) polishes.
Fix it: Always start with a coarse disc and move to a finer one. Skipping grits can leave the surface rough or too smooth.
Managing Dust Effectively
Grinding concrete creates a lot of dust, which can be harmful. It also makes a mess.
Fix it: Use a vacuum attachment while grinding. Work in a well-ventilated space and wear a dust mask. Clean the area regularly to keep the dust under control.
DIY Concrete Floor Grinding vs. Hiring a Professional
When DIY is a Good Option
DIY is a great choice if you have a small floor to grind. It’s perfect for patios, walkways, or garage floors that need little work. I did my garage floor, and though it was tough, I saved money and felt proud when I finished. Renting the tools isn’t too costly, and you can work at your own pace.
Short Answer: DIY is best for small jobs or touch-ups.
Signs You Should Call a Pro
Sometimes, it’s better to hire a professional. If your concrete has deep cracks or a lot of old coatings, they can fix it faster and better. A friend tried grinding a big room by themselves and ended up frustrated. If the job is big, or you’re unsure about using the tools, calling in a pro is safer.
Short Answer: Call a pro for large jobs or if you’re unsure about the process.
This version uses simpler language, short sentences, and a direct, easy-to-read style that ensures maximum clarity and accessibility.
FAQs
Can I grind concrete with an angle grinder?
Yes, you can! An angle grinder works well for small areas, like edges and tight spots. I’ve used one in my garage, which did the job just fine. Just make sure to pick the right disc for the task!
Short Answer: Yes, great for small areas and edges.
How long does it take to grind a concrete floor?
It depends on the size and condition of your floor. For smaller spaces, it may only take a few hours. For a big area, it could take a whole day. When I did my garage, it took about 6 hours, but I went slowly to ensure it was smooth.
Short Answer: A few hours are needed for small areas, and a full day is needed for larger ones.
What’s the best way to control dust while grinding concrete?
Dust can be a problem, so use a vacuum attachment. It helps keep the area clean and safe. I opened windows and wore a dust mask when I ground my floor. It made the job much cleaner.
Short Answer: Use a vacuum and wear a dust mask.
Do I need to seal the concrete after grinding?
Sealing the floor is a good idea. Sealing helps protect it from stains and keeps it looking nice. After grinding, I sealed my garage floor, and it’s been easy to clean since.
Short Answer: Yes, sealing helps protect and maintain the surface.
This version is designed for maximum readability and ease of understanding. Let me know if you need further changes!
Conclusion
Grinding concrete might sound like a tough job, but it’s actually easier than most people think. With the right tools, a little preparation, and some patience, you can turn a rough, bumpy floor into one that’s perfectly smooth.
We’ve already gone over how to pick the best grinder, which discs you should use, and how to stay safe while you’re working.
When I did my garage floor, I was nervous at first. But once I started, it wasn’t that bad! The result was great, and I saved money by doing it myself.
If you’re starting, you’ll need a concrete grinder (or angle grinder for small areas), grinding discs (don’t skip the coarse grit), and a vacuum attachment to control dust. Be sure to wear your safety gear—gloves, goggles, and a respirator.
Do you have any tips or questions? Share them in the comments! I’d love to hear about your concrete grinding projects. Remember, DIY is great for small jobs, but don’t hesitate to call a pro if needed. Take your time and enjoy the process!

Hi, I’m Larry Fish, the mind behind MyGrinderGuide.com.. With a passion for all things kitchen appliances, I created this blog to share my hands-on experience and expert knowledge. Whether it’s helping you choose the right tools for your culinary adventures or offering tips to make your kitchen more efficient, I’m here to guide you. My goal is to make your time in the kitchen not only easier but also enjoyable! Welcome to my world of kitchen mastery!